Common Workflows
This section covers some common workflows. It is recommended to review the version control operations section prior to this section.
Proposing Data Changes
Creating A Branch
To create a new branch, navigate to Version Control –> Branches –> + or Version Control –> Branches –> + Add.
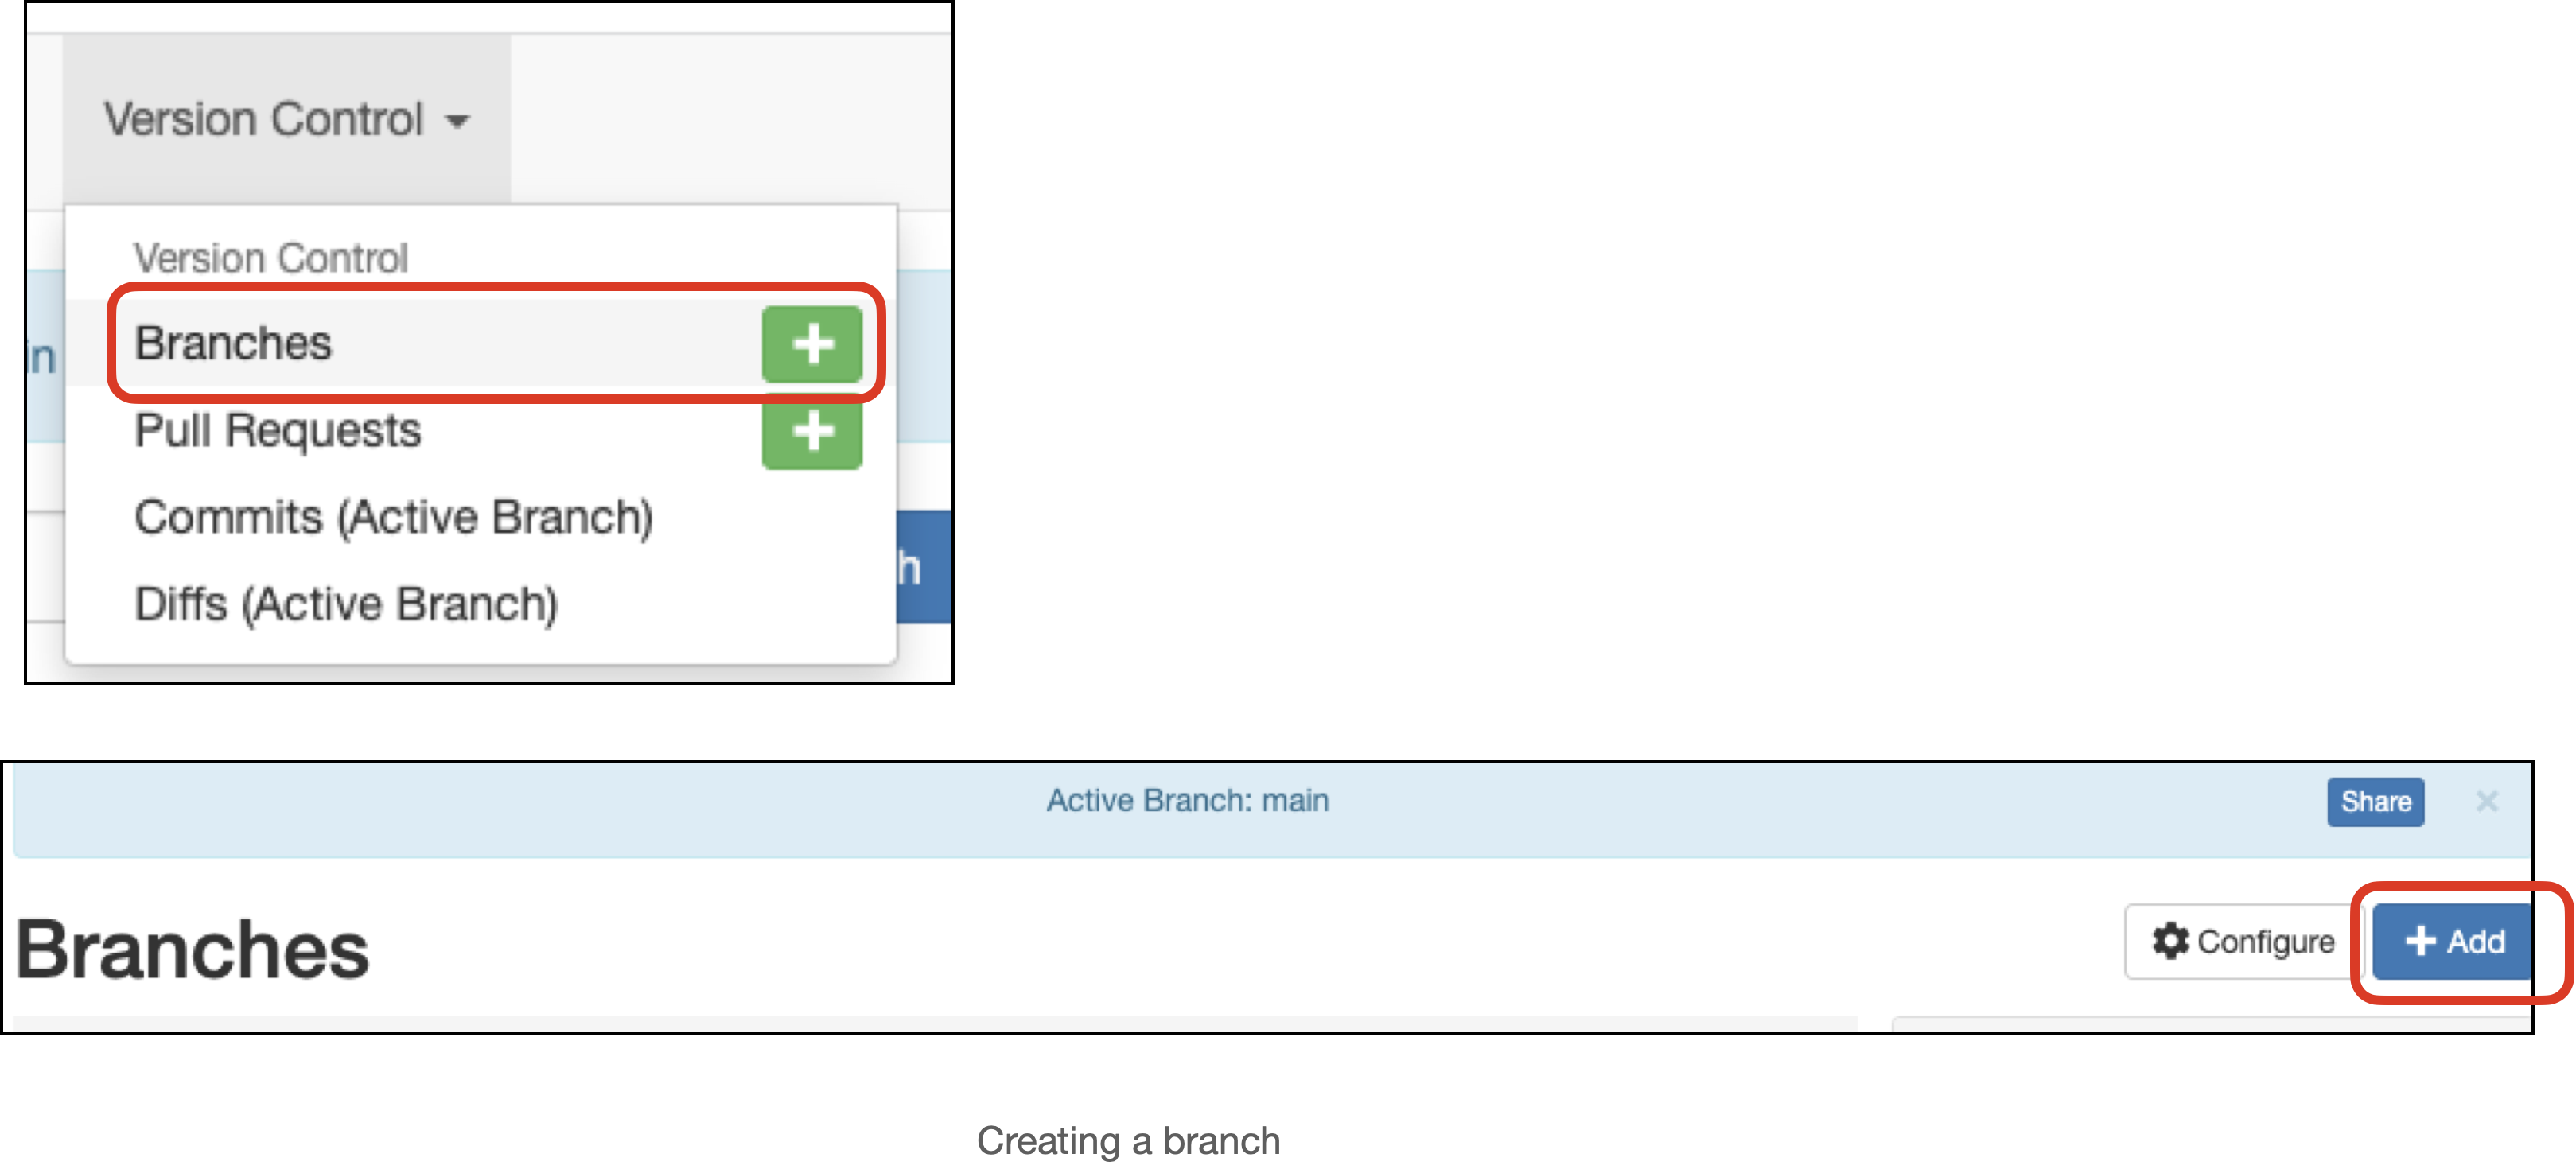
Fill out the form, filling in the Name and selecting the starting branch (defaults to main).
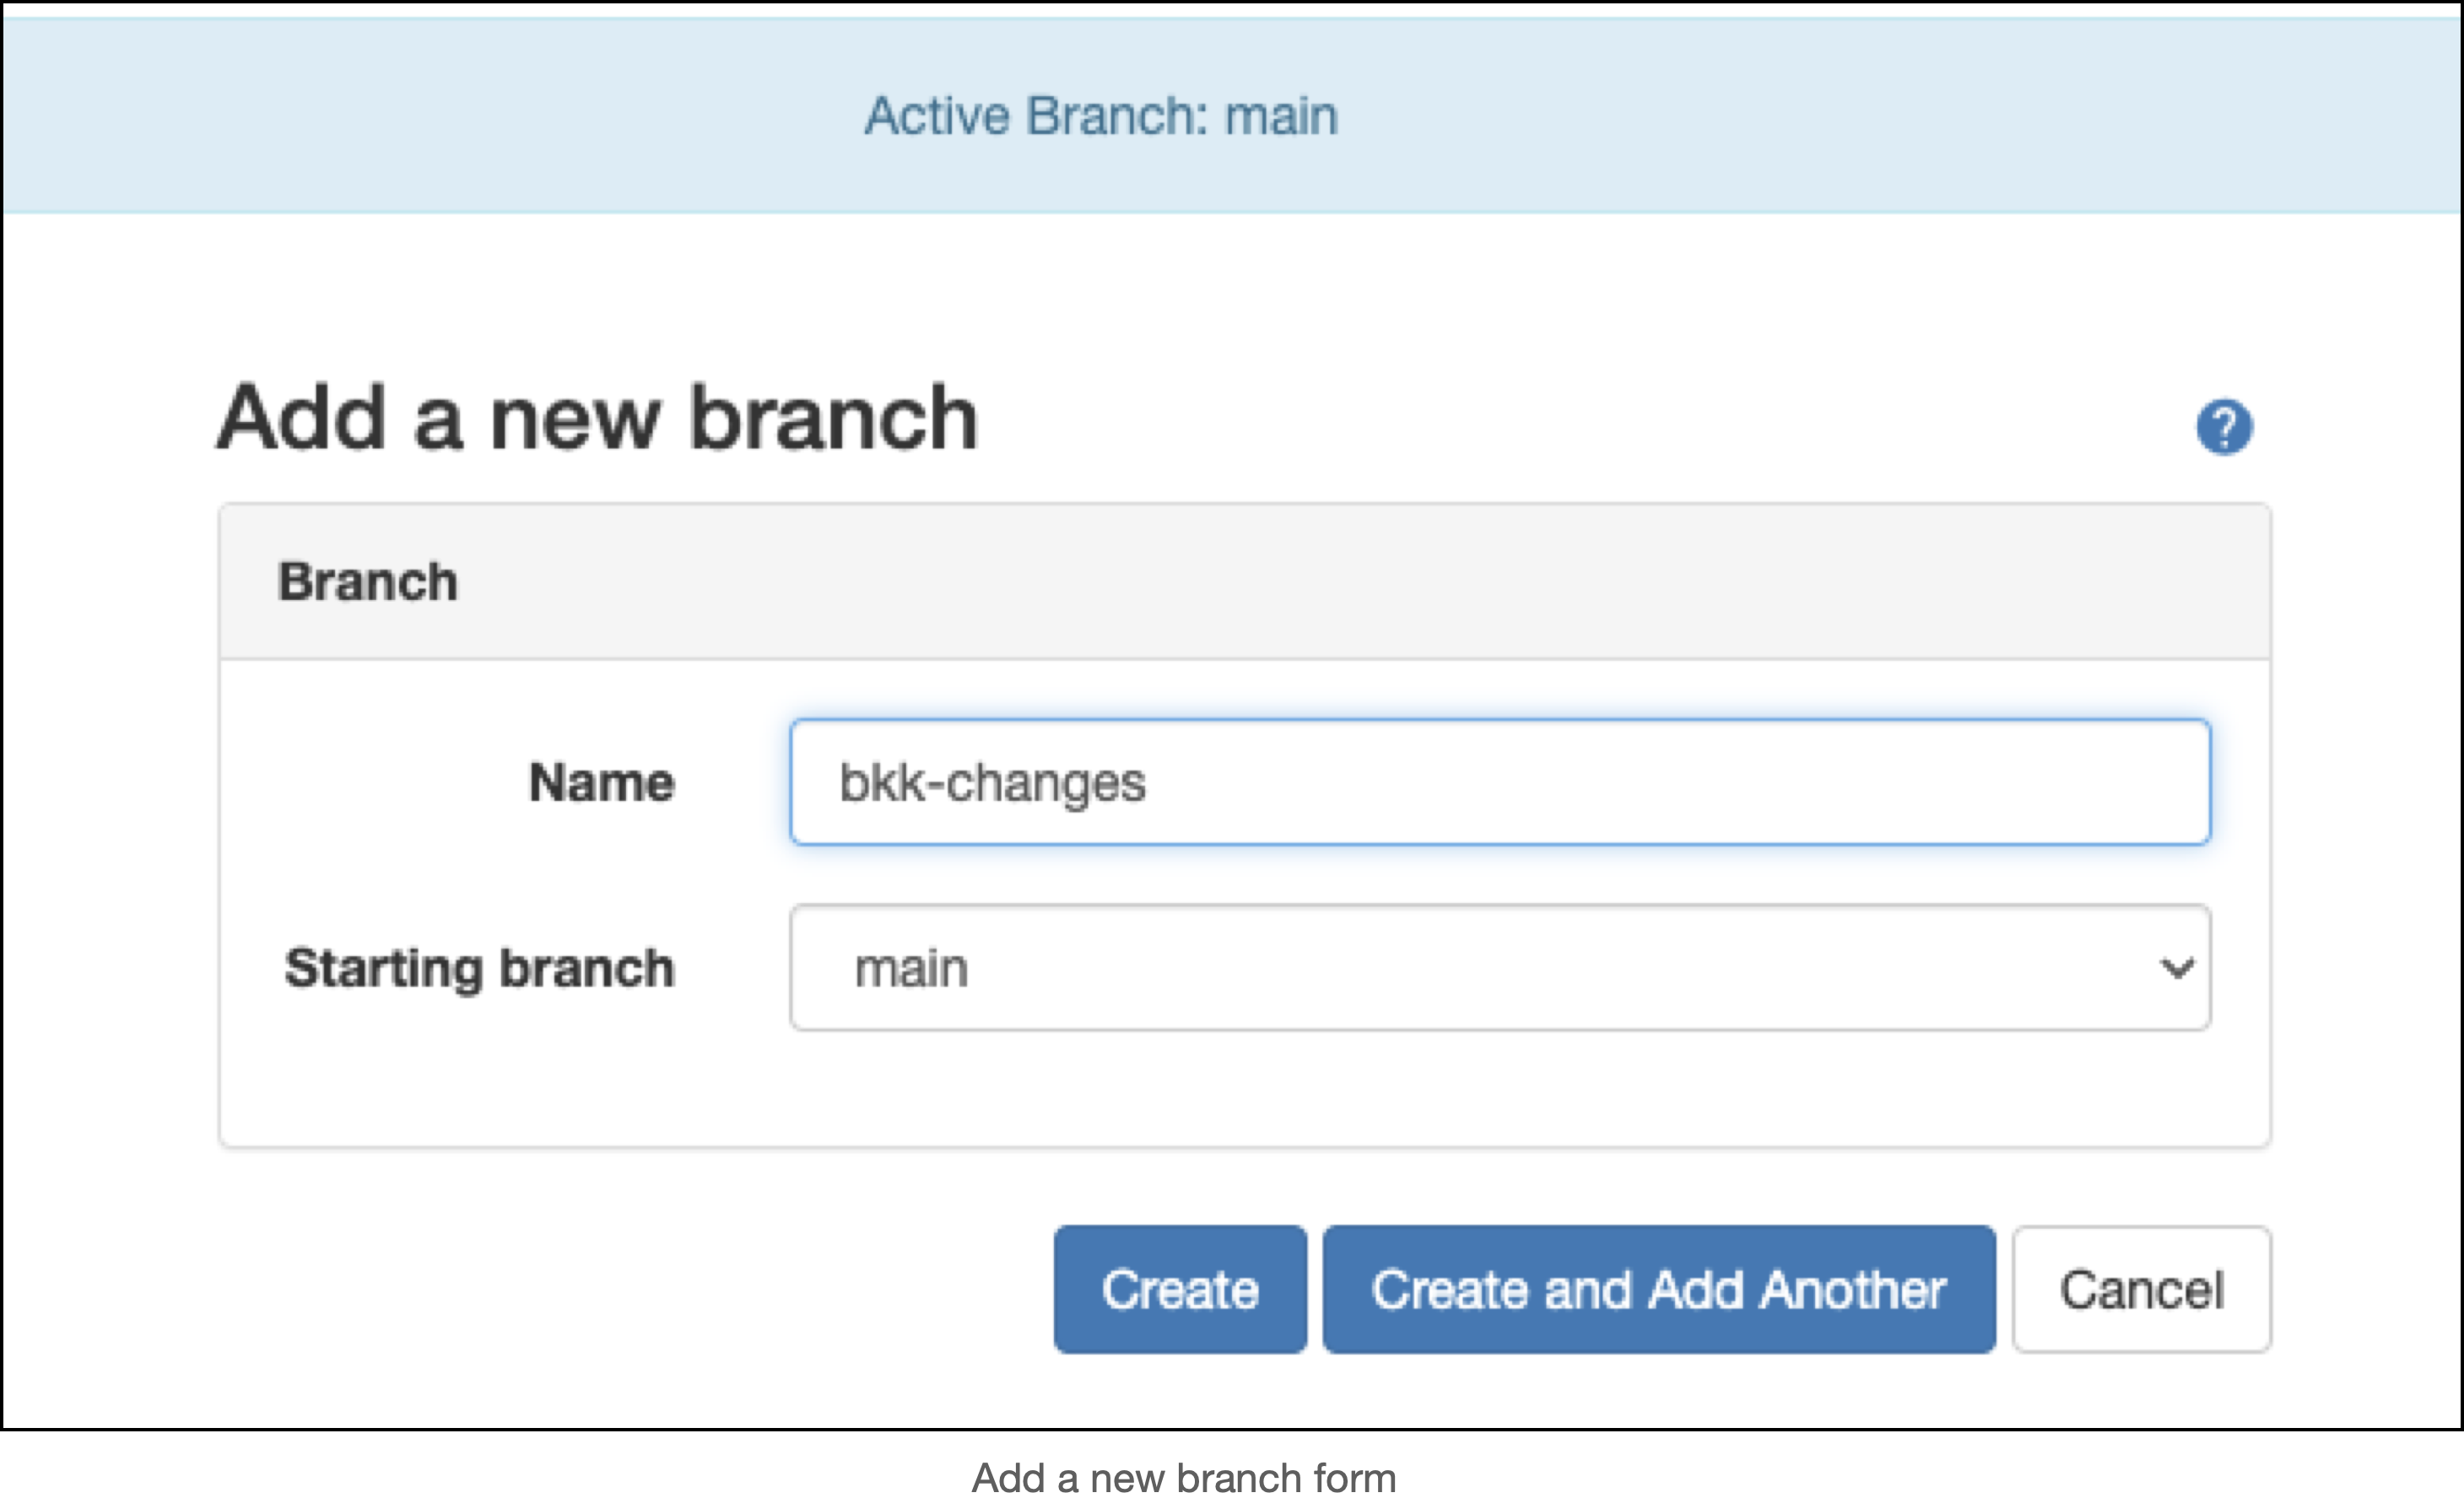
NOTE: The branch name must be in slug form, consisting of letters, numbers, underscores or hyphens (no spaces).
Click the Create button.
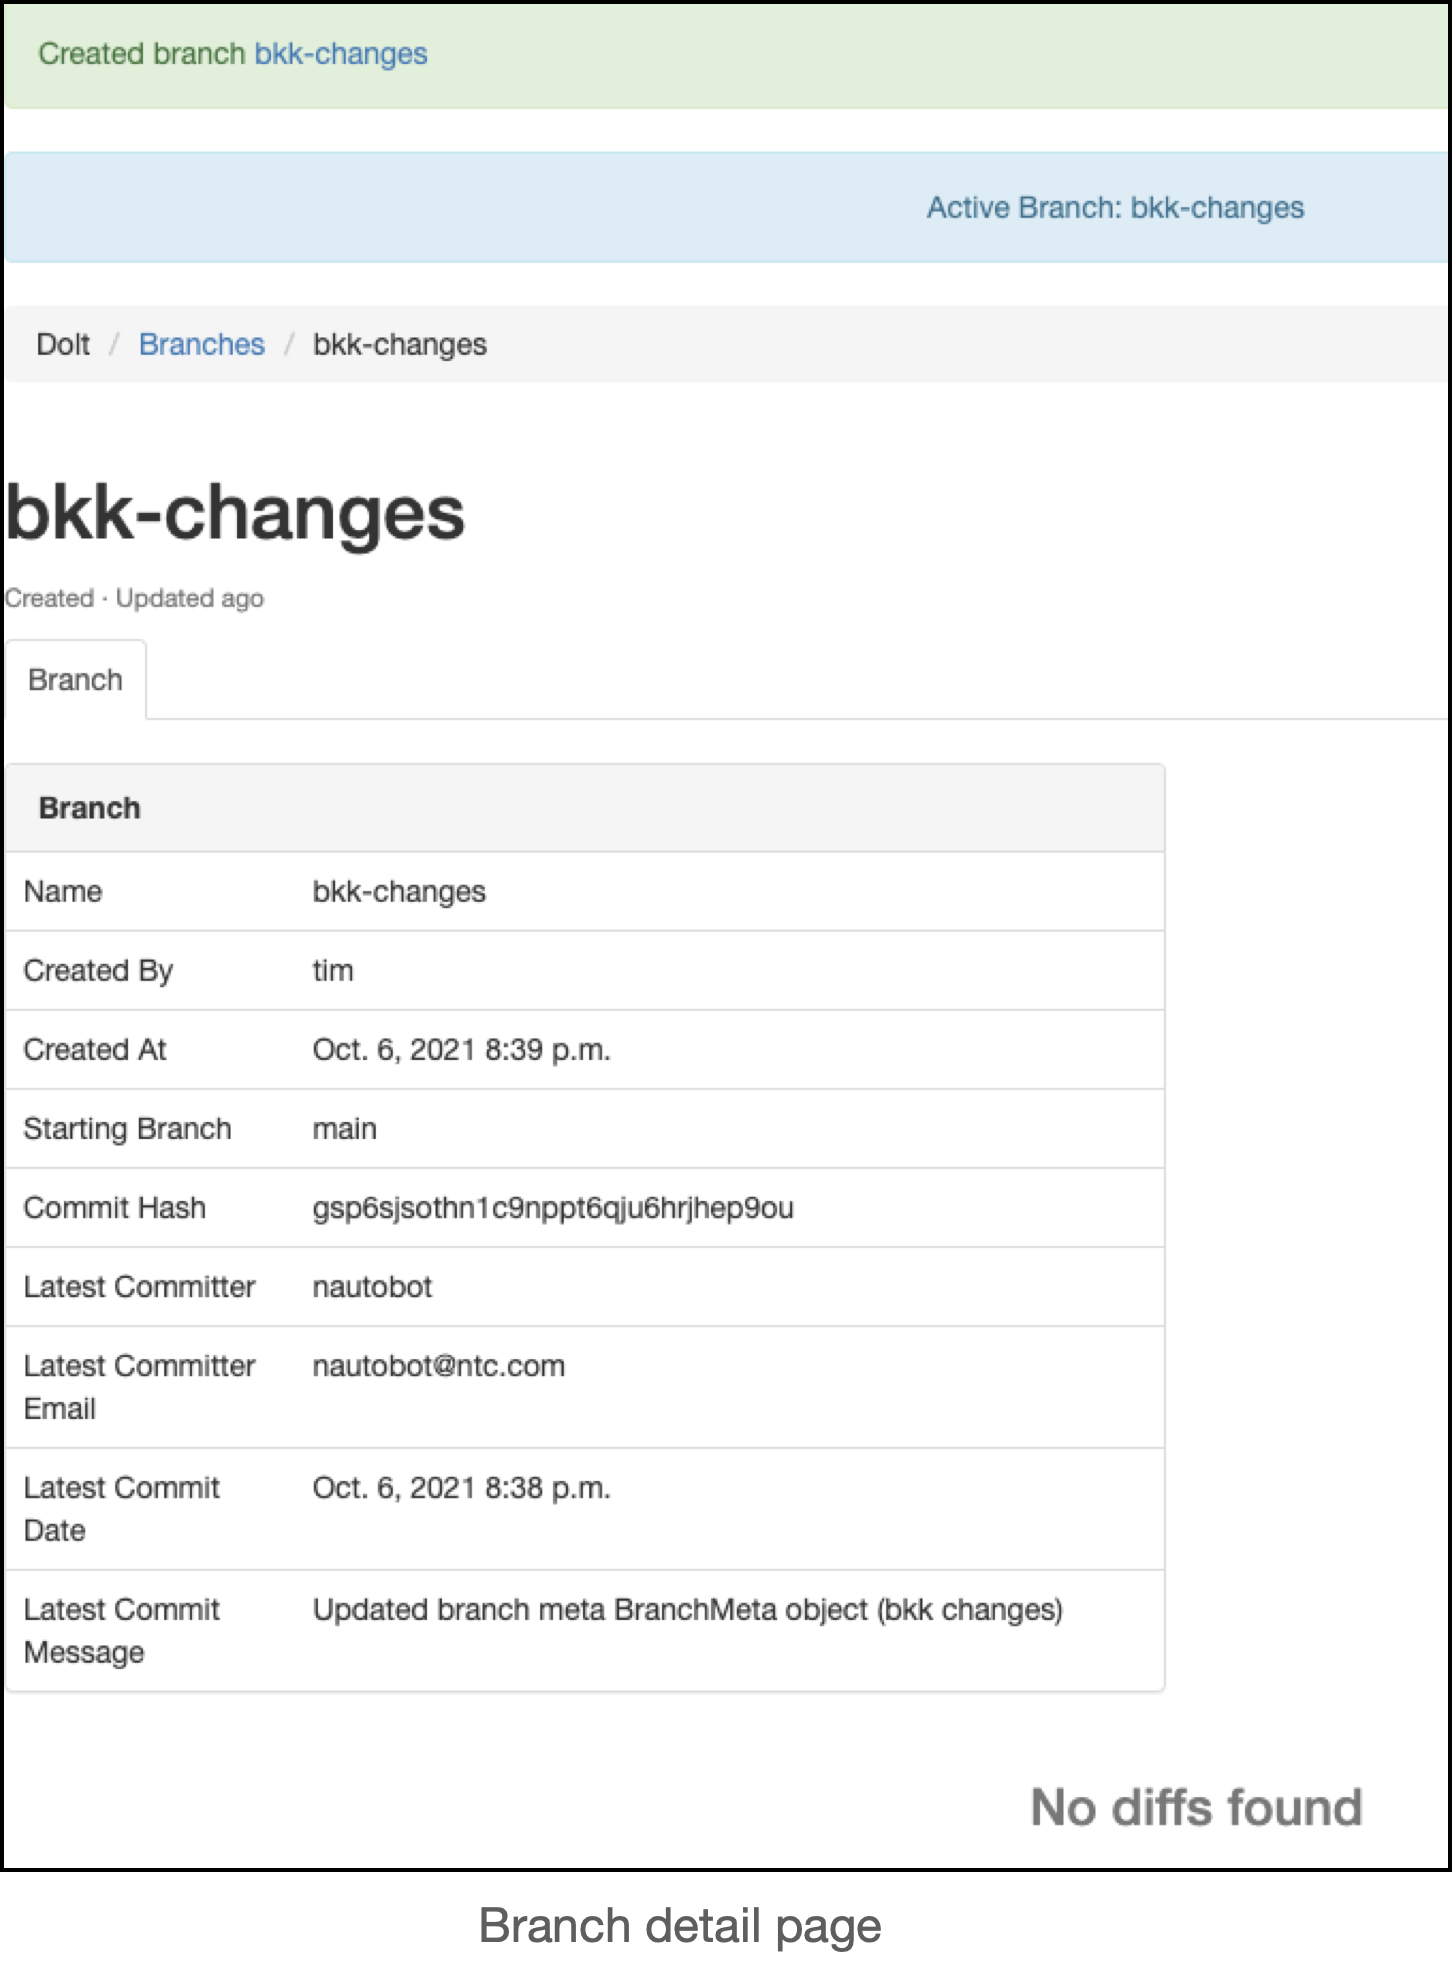
Once the branch is created:
You will be taken to the detail view for the branch
A banner will appear, notifying you that the branch was created
A second banner will appear, showing that the newly created branch is now the active branch
Making Changes To The Data
Any changes to data in Nautobot will be limited to the active branch. To avoid making changes to production data, ensure a non-main branch is active:
Create a new branch: upon creation, that branch will become active
Switch to an existing non-main branch: Version Control –> Branches –> ‘Activate’ a non-main branch
You should see a banner indicating that the created/selected branch is the Active Branch.
Make changes to the data as necessary in that branch.
Reviewing Changes
To review changes in your branch (compared to the starting branch): Version Control –> Diffs.
Use the diffs page to review/confirm your changes prior to submitting a pull request (PR) to merge the changes into the main (production) branch.
The diffs page contains:
A panel on the left hand side with meta data about the PR
A panel on the right hand side with a diff summary for the PR
The number of adds, changes, and deletions in the PR are highlighted in green, orange, and red, respectively
Clicking on a section of the diff summary will take you to the detailed changes for that section
The detailed diffs, organized by sections (Device, Circuit, Console port, Interface, Power port)
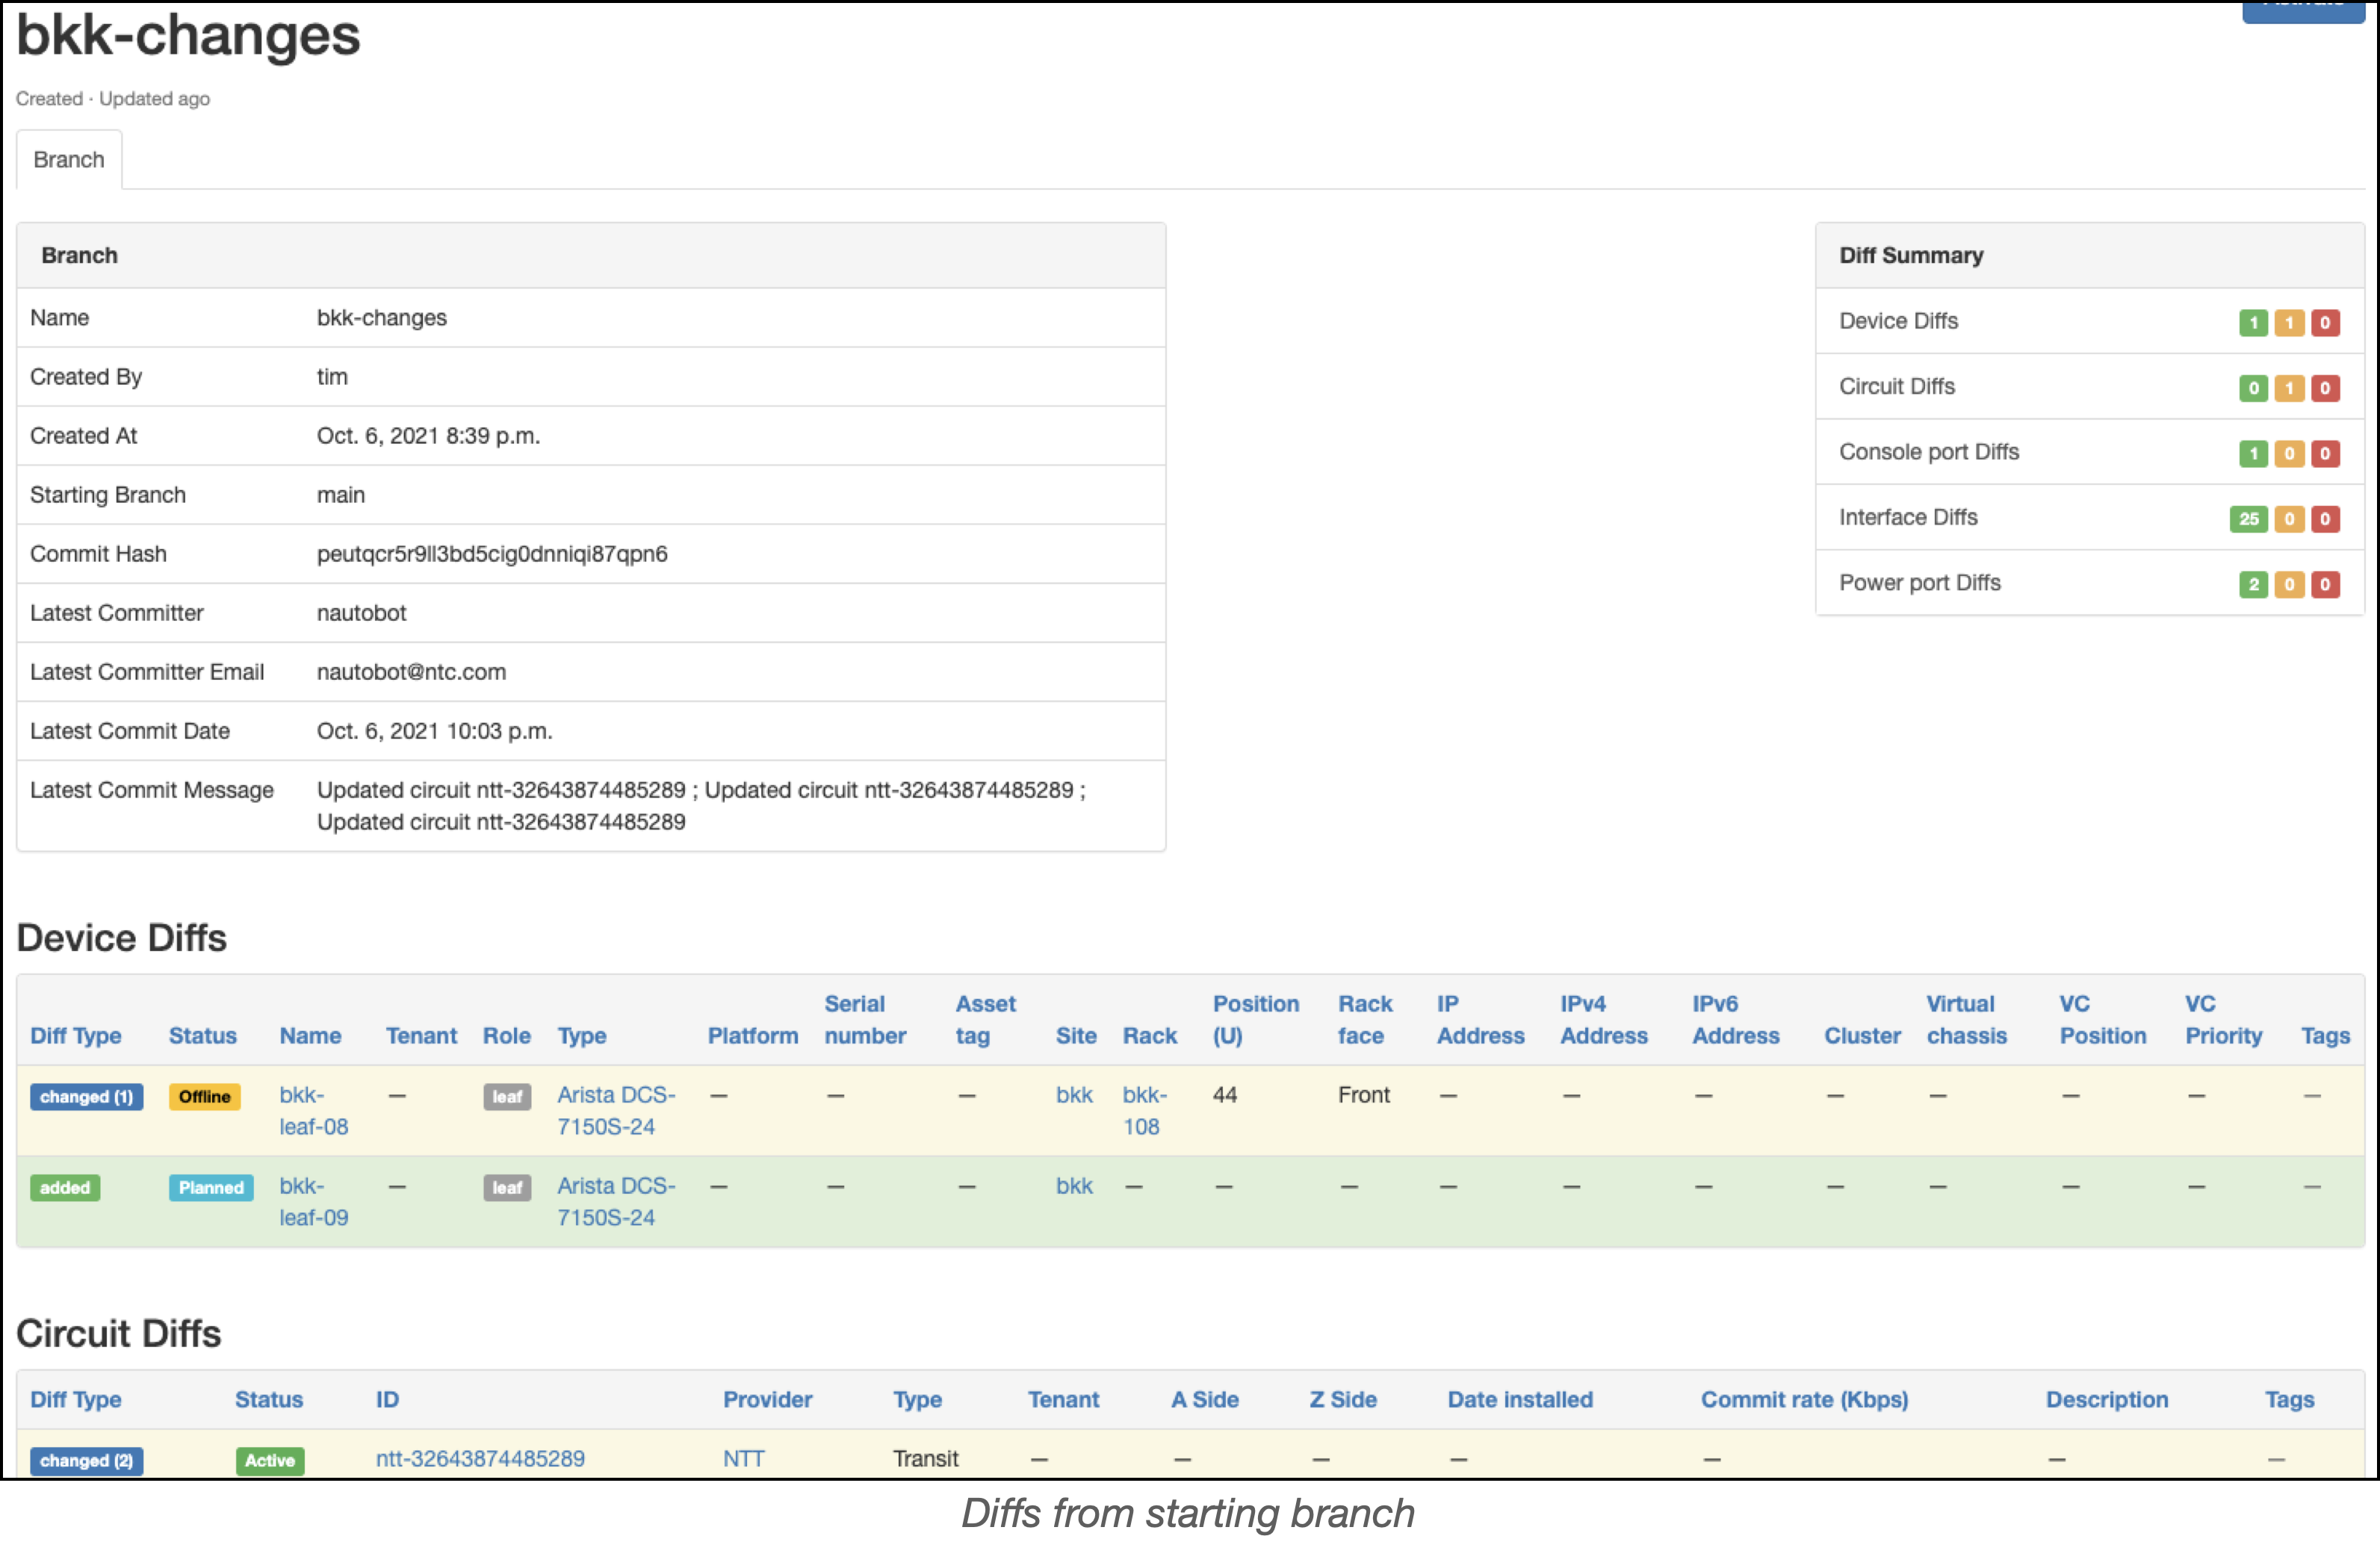
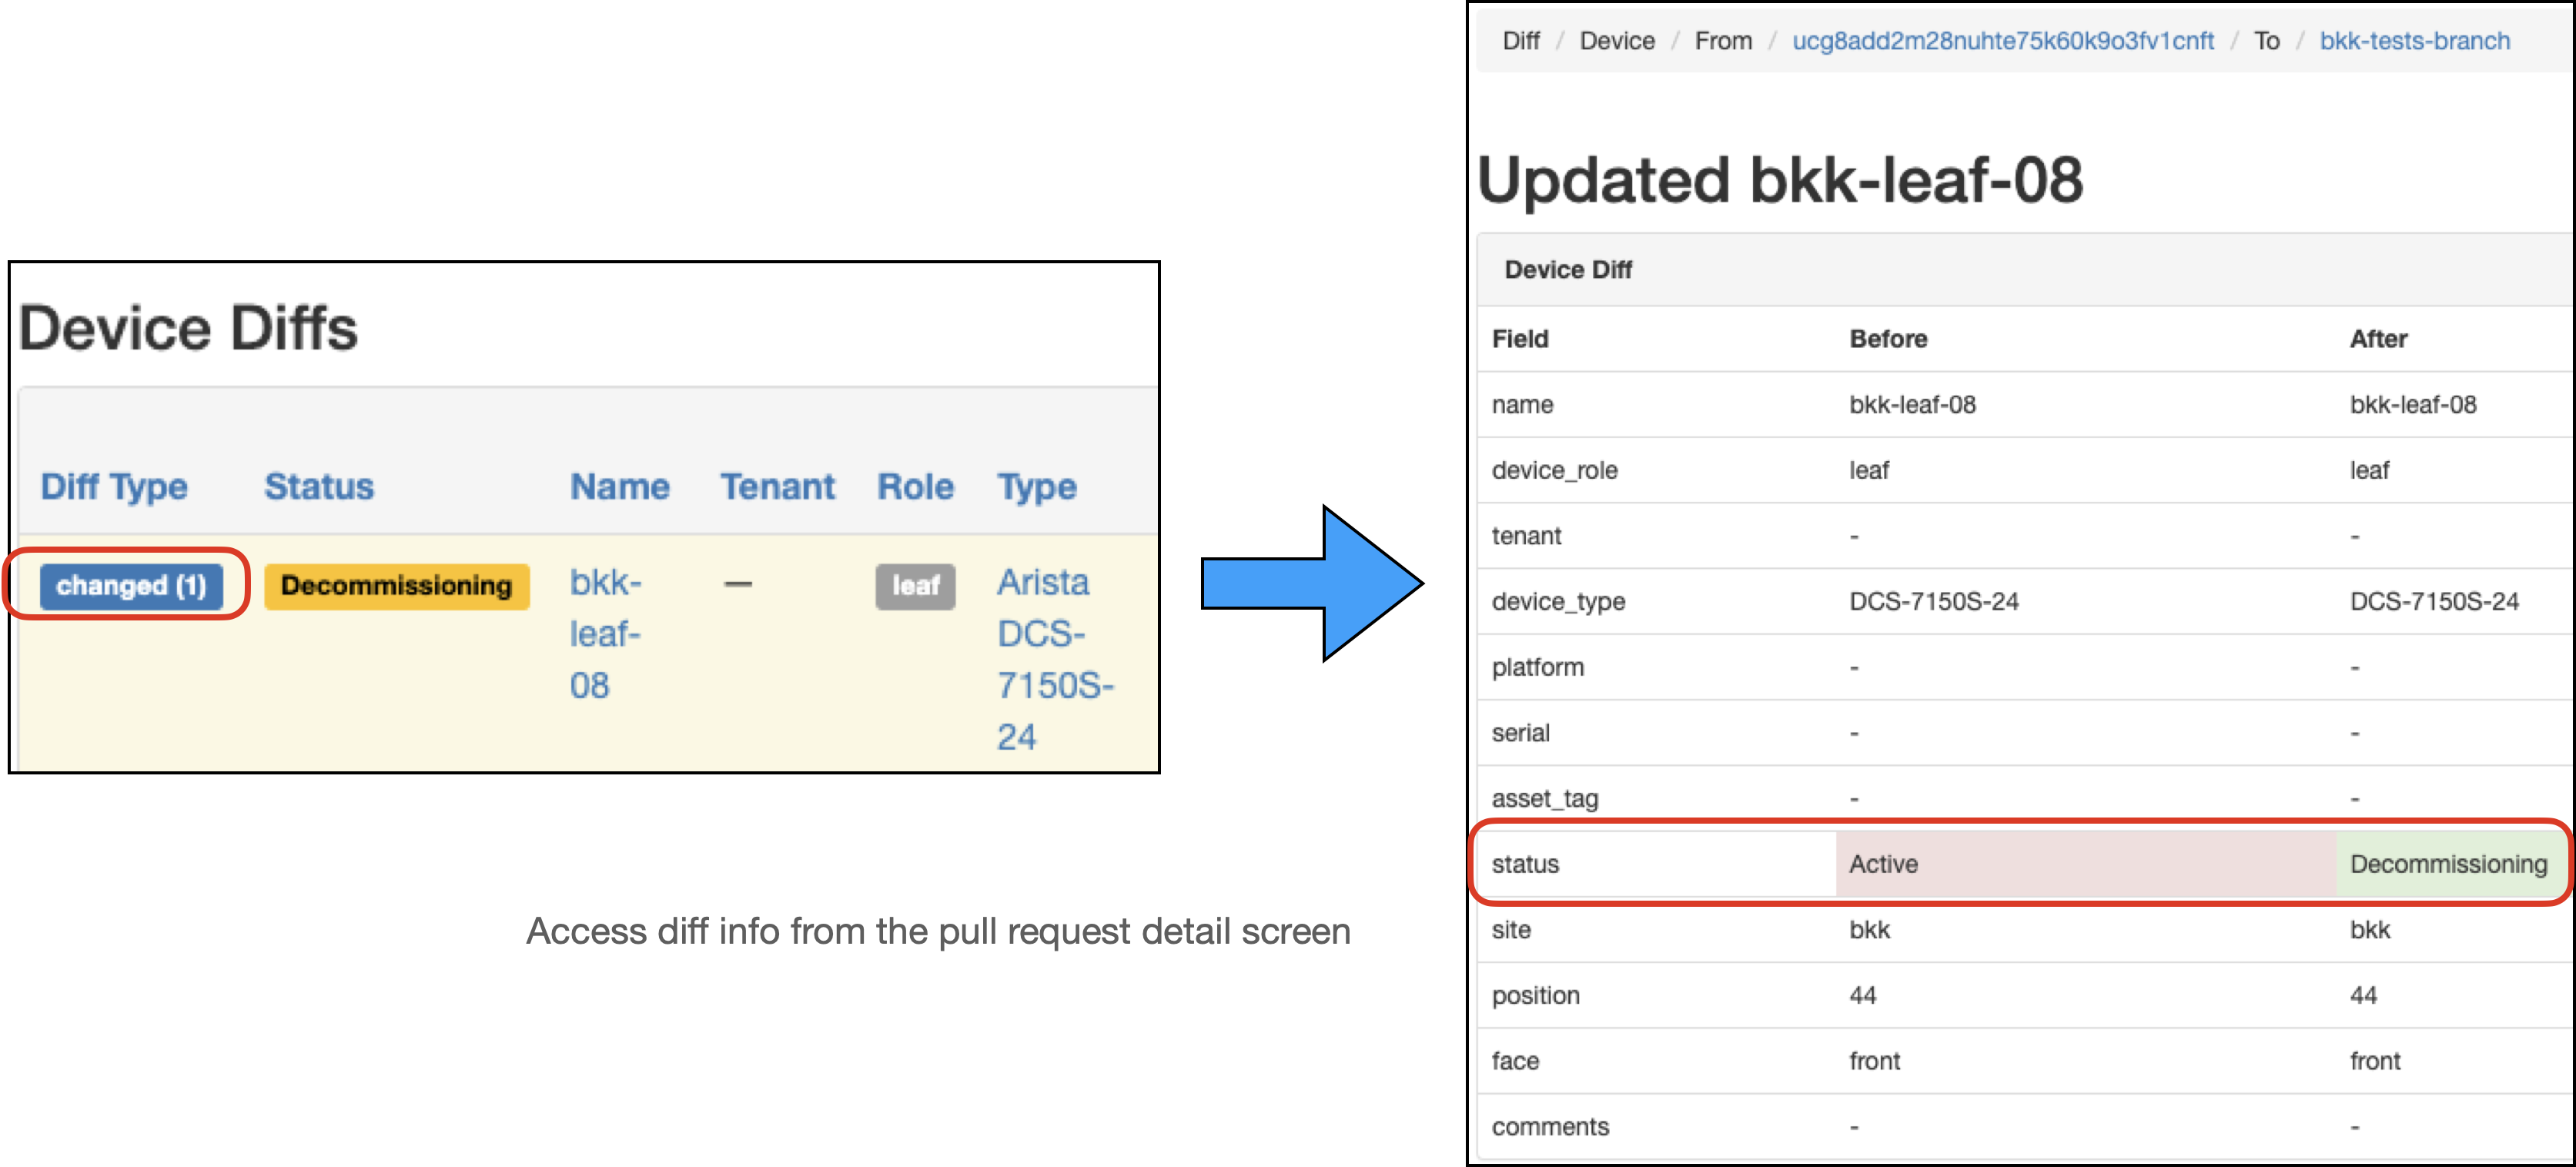
In the detailed diffs section, there is a Diff Type column; this column contains a badge with the type of change (added/changed/deleted).
Clicking on the Diff Type badge for a specific change takes you to the specific change for that diff.
The example below shows that the bkk-leaf-08 status changed from Active to Decommissioning in that diff:
Viewing Branch Commits
To view commits in a given branch, activate the branch with the commits you are interested in.
See the Commits documentation to learn how to view commits in the selected branch.
The Pull Request (PR) Process
After reviewing changes on a branch and any specific diffs for the changes, a user will typically want to submit a PR to merge the changes in the branch into the main (production) branch.
Creating a PR
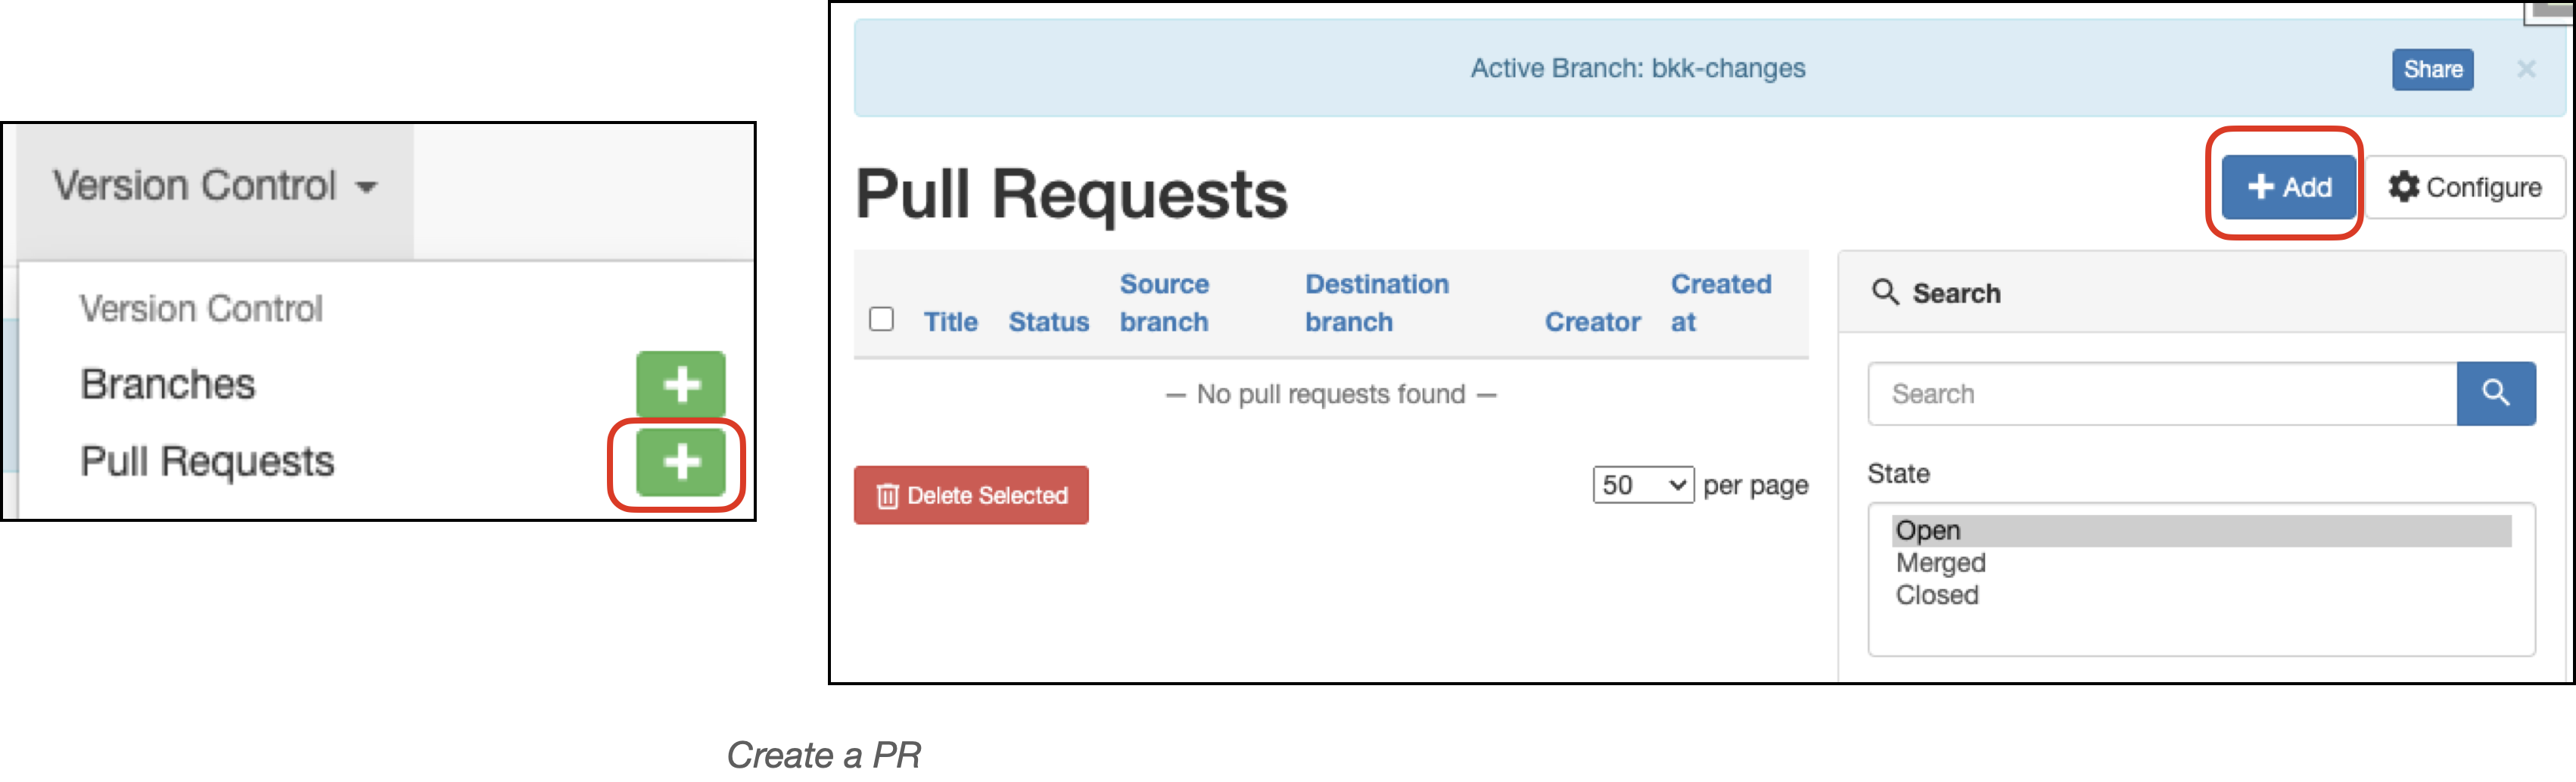
To create a PR, navigate to Version Control –> Pull Requests –> + Add. You may also create the PR directly from the navigation menu: Version Control –> Pull Requests –>+ if you don’t wish to view all the open PRs prior to creating a PR.
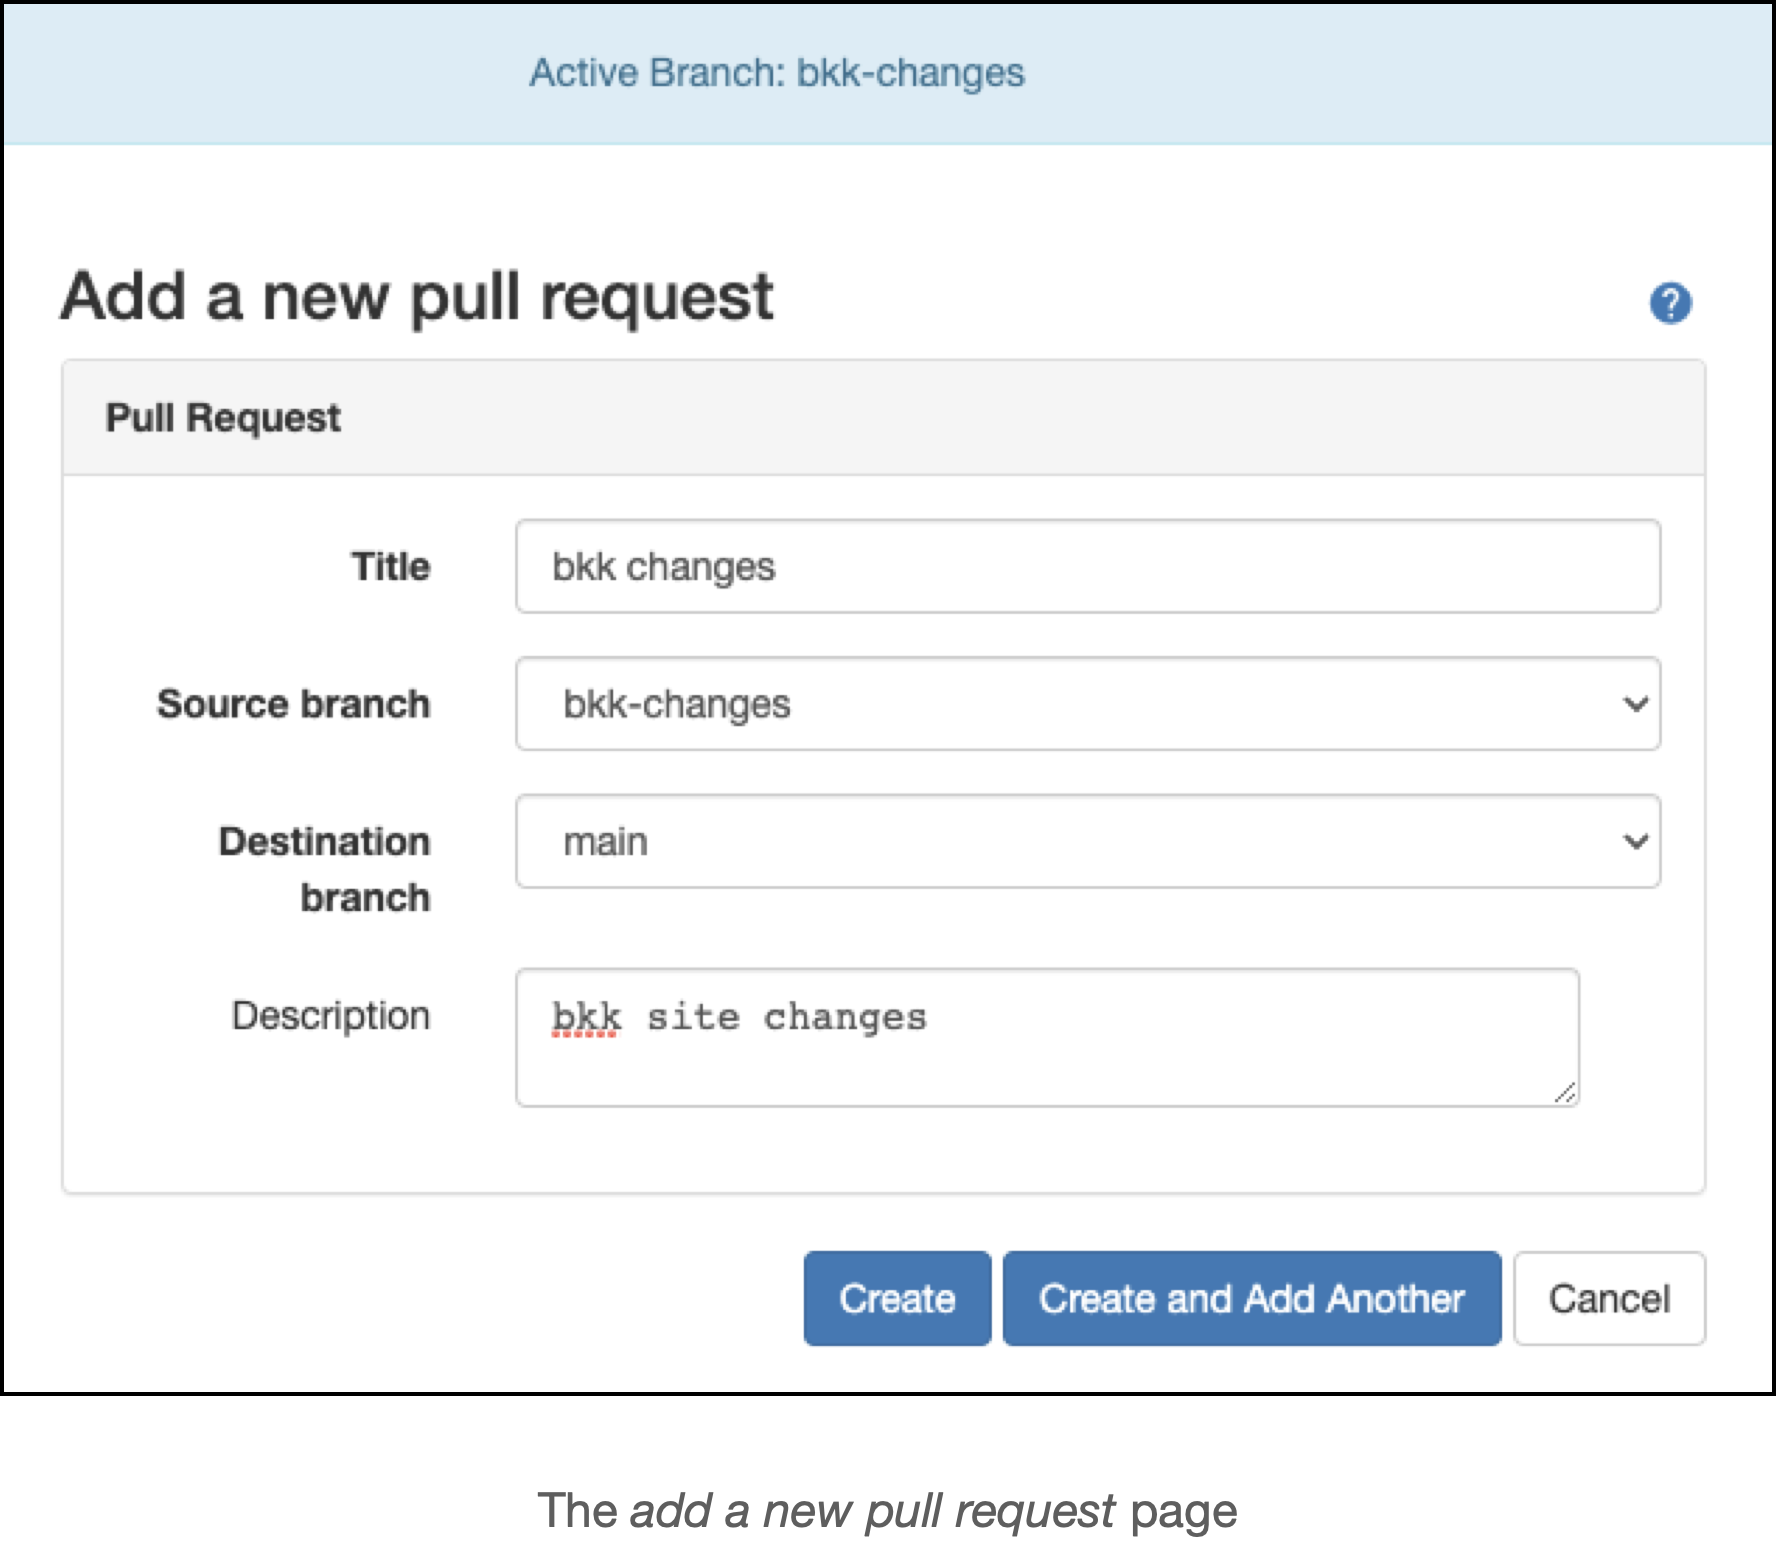
Once on the Add a new pull request screen, fill out the requested details and click on Create
The Pull Request (PR) Detail View
Creating the PR will take you to the PR detail page, which has 4 tabs, explained here.
Reviewing a PR
Ideally, a different user would review the PR prior to merging the changes into to main branch.
To review a PR, go to Version Control –> Pull Requests.
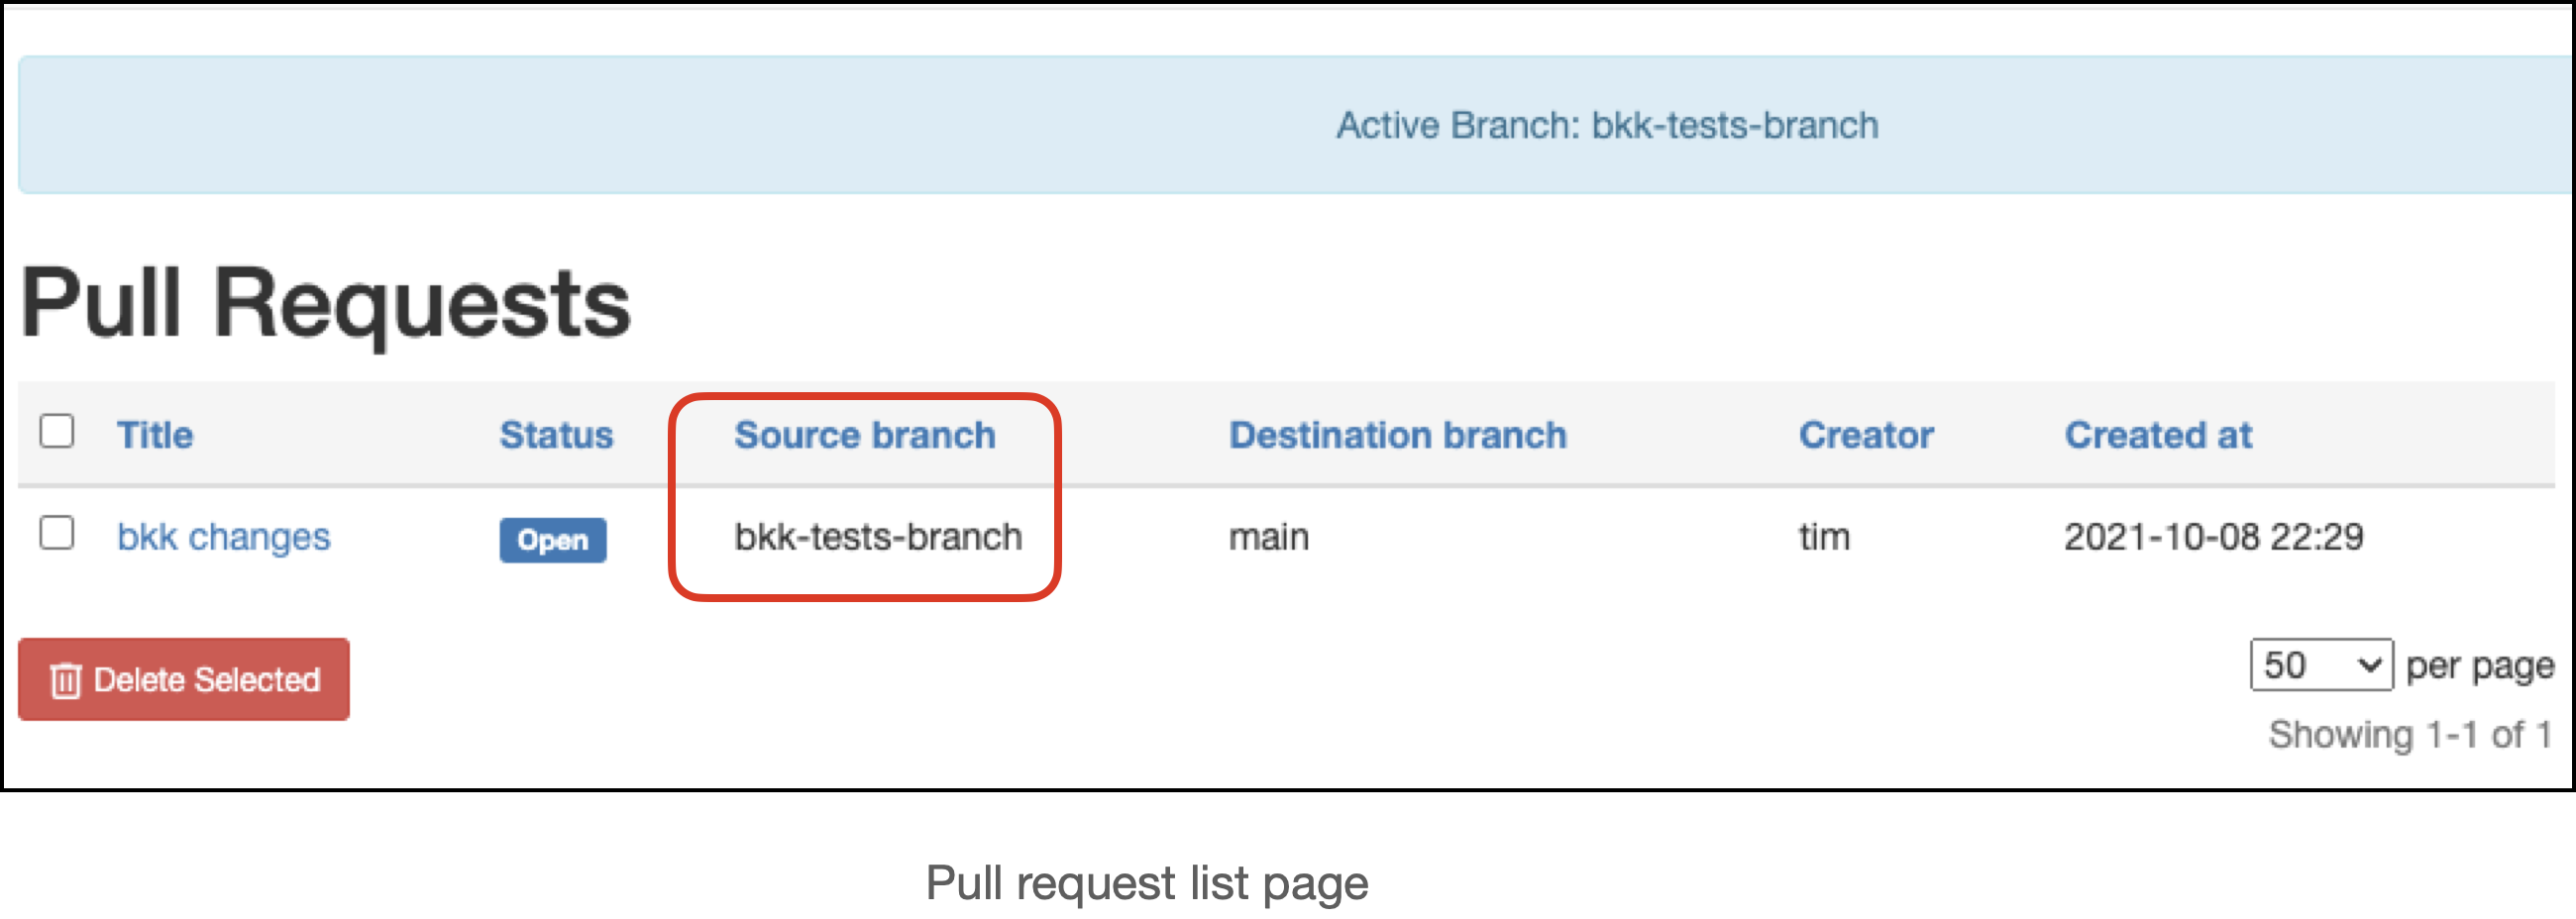
This will take you to the pull requests list page; once there:
Determine which PR you want to review and its source branch
Switch the active branch to that of the PR source branch (this is necessary if you wish to revert any changes in the PR)
Navigate back to the PR list page and click on the desired PR
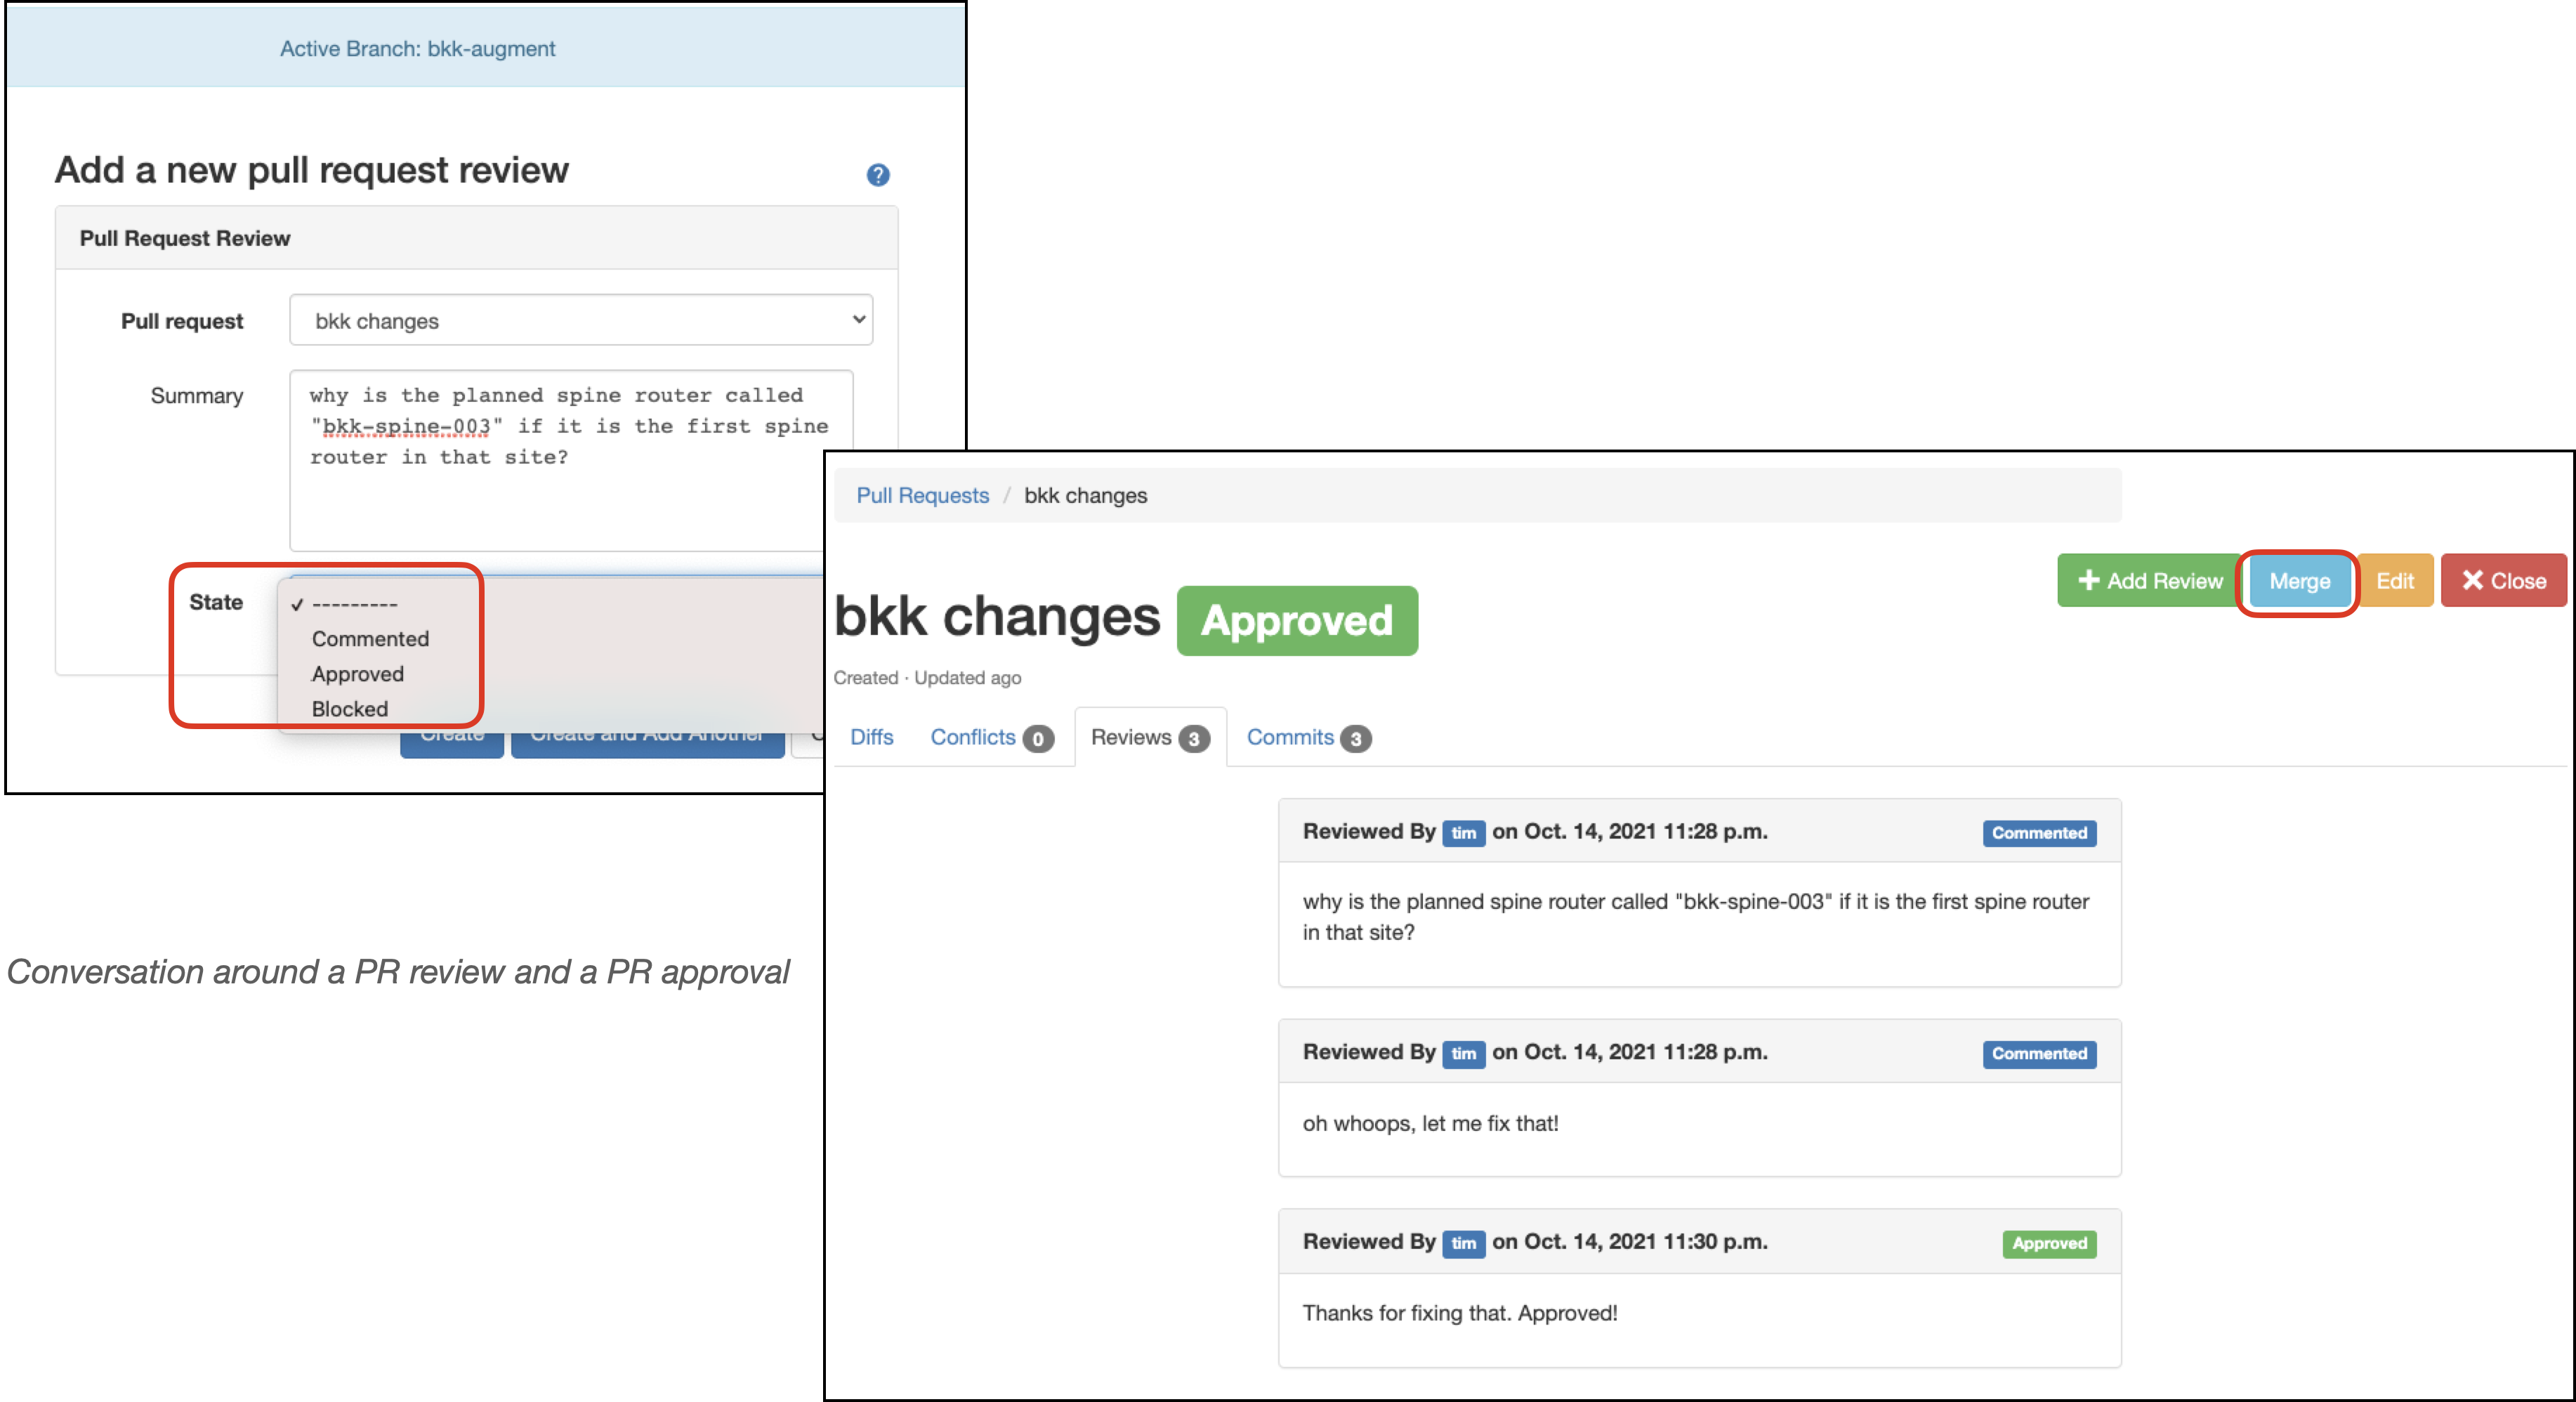
Once you have reviewed changes proposed in the PR, click on the Reviews tab to start a review discussion. Here, you can start a conversation around the PR, including any questions or comments on the changes.

Each review can be a Comment, Approval, or Blocked operation. Once the PR is moved to Approved status, a Merge button appears, allowing the reviewer to merge the changes into the destination branch. For more information on merges, see version control operations section on merges.
Resolving Conflicts
Should a conflict arise when a PR is created, you will see an indication on the Conflicts tab:
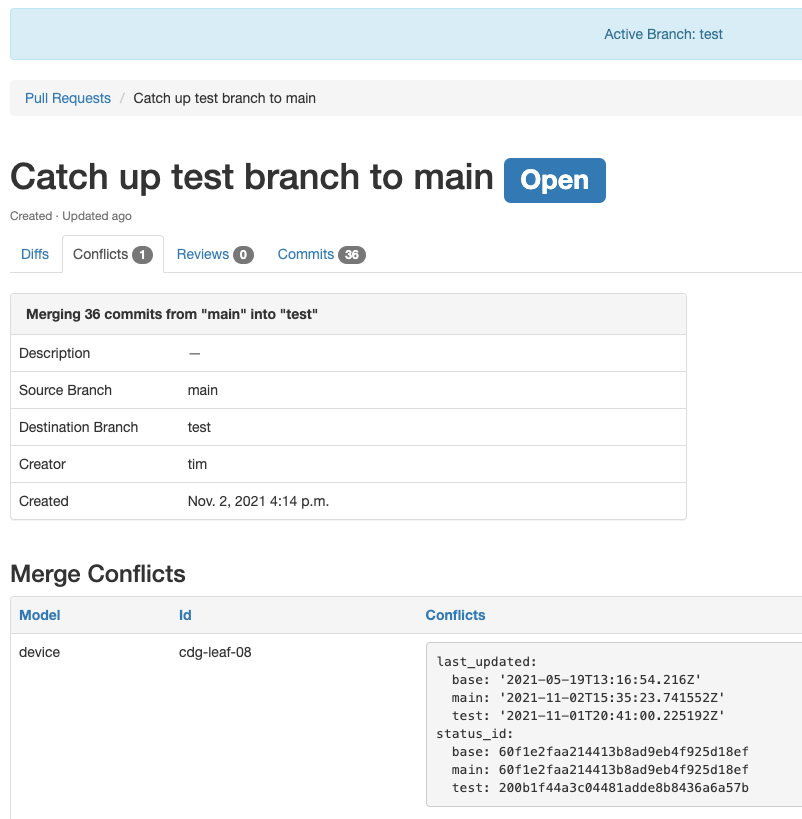
Should a conflict come up, you can do the following:
Note the object(s) with the conflict(s) (
cdg-leaf-08in this example) and go to theCommitstab on the PRSearch for the object with the conflict (
cdg-leaf-08in this example)
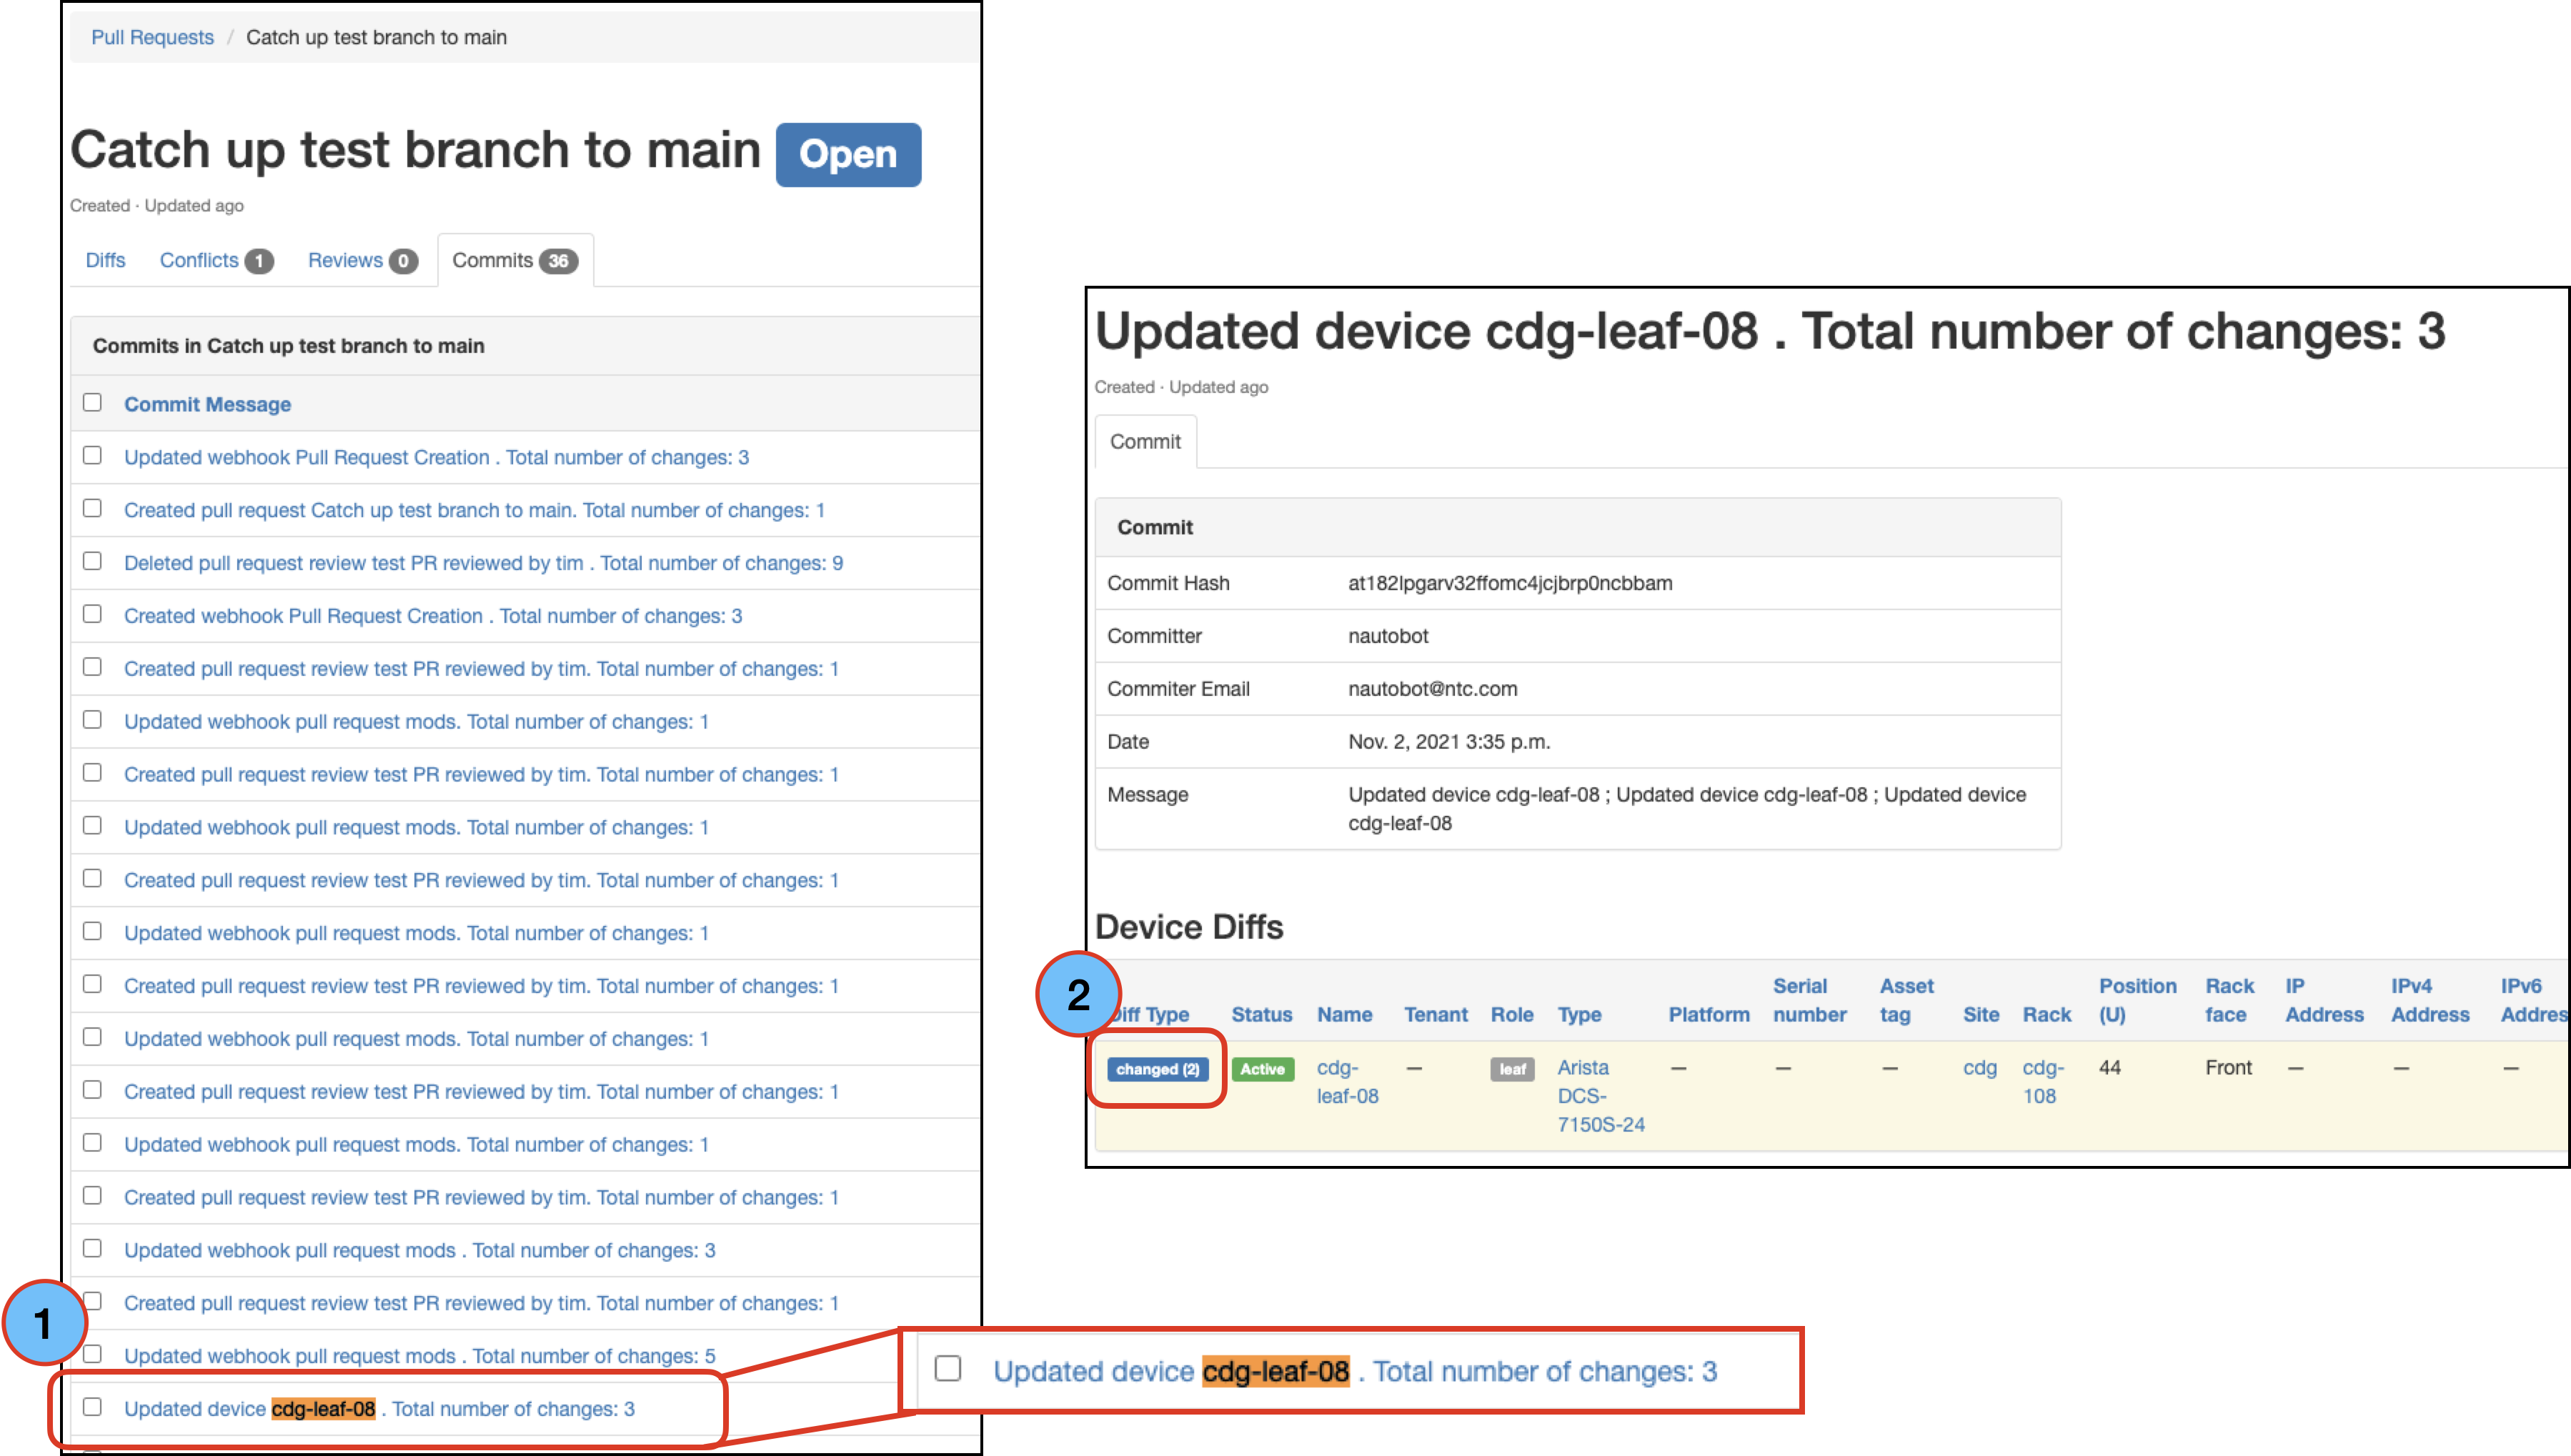
Right-click on the commit (open in new tab) to view the diff –> click on the
Diff Typebadge to view the specific change
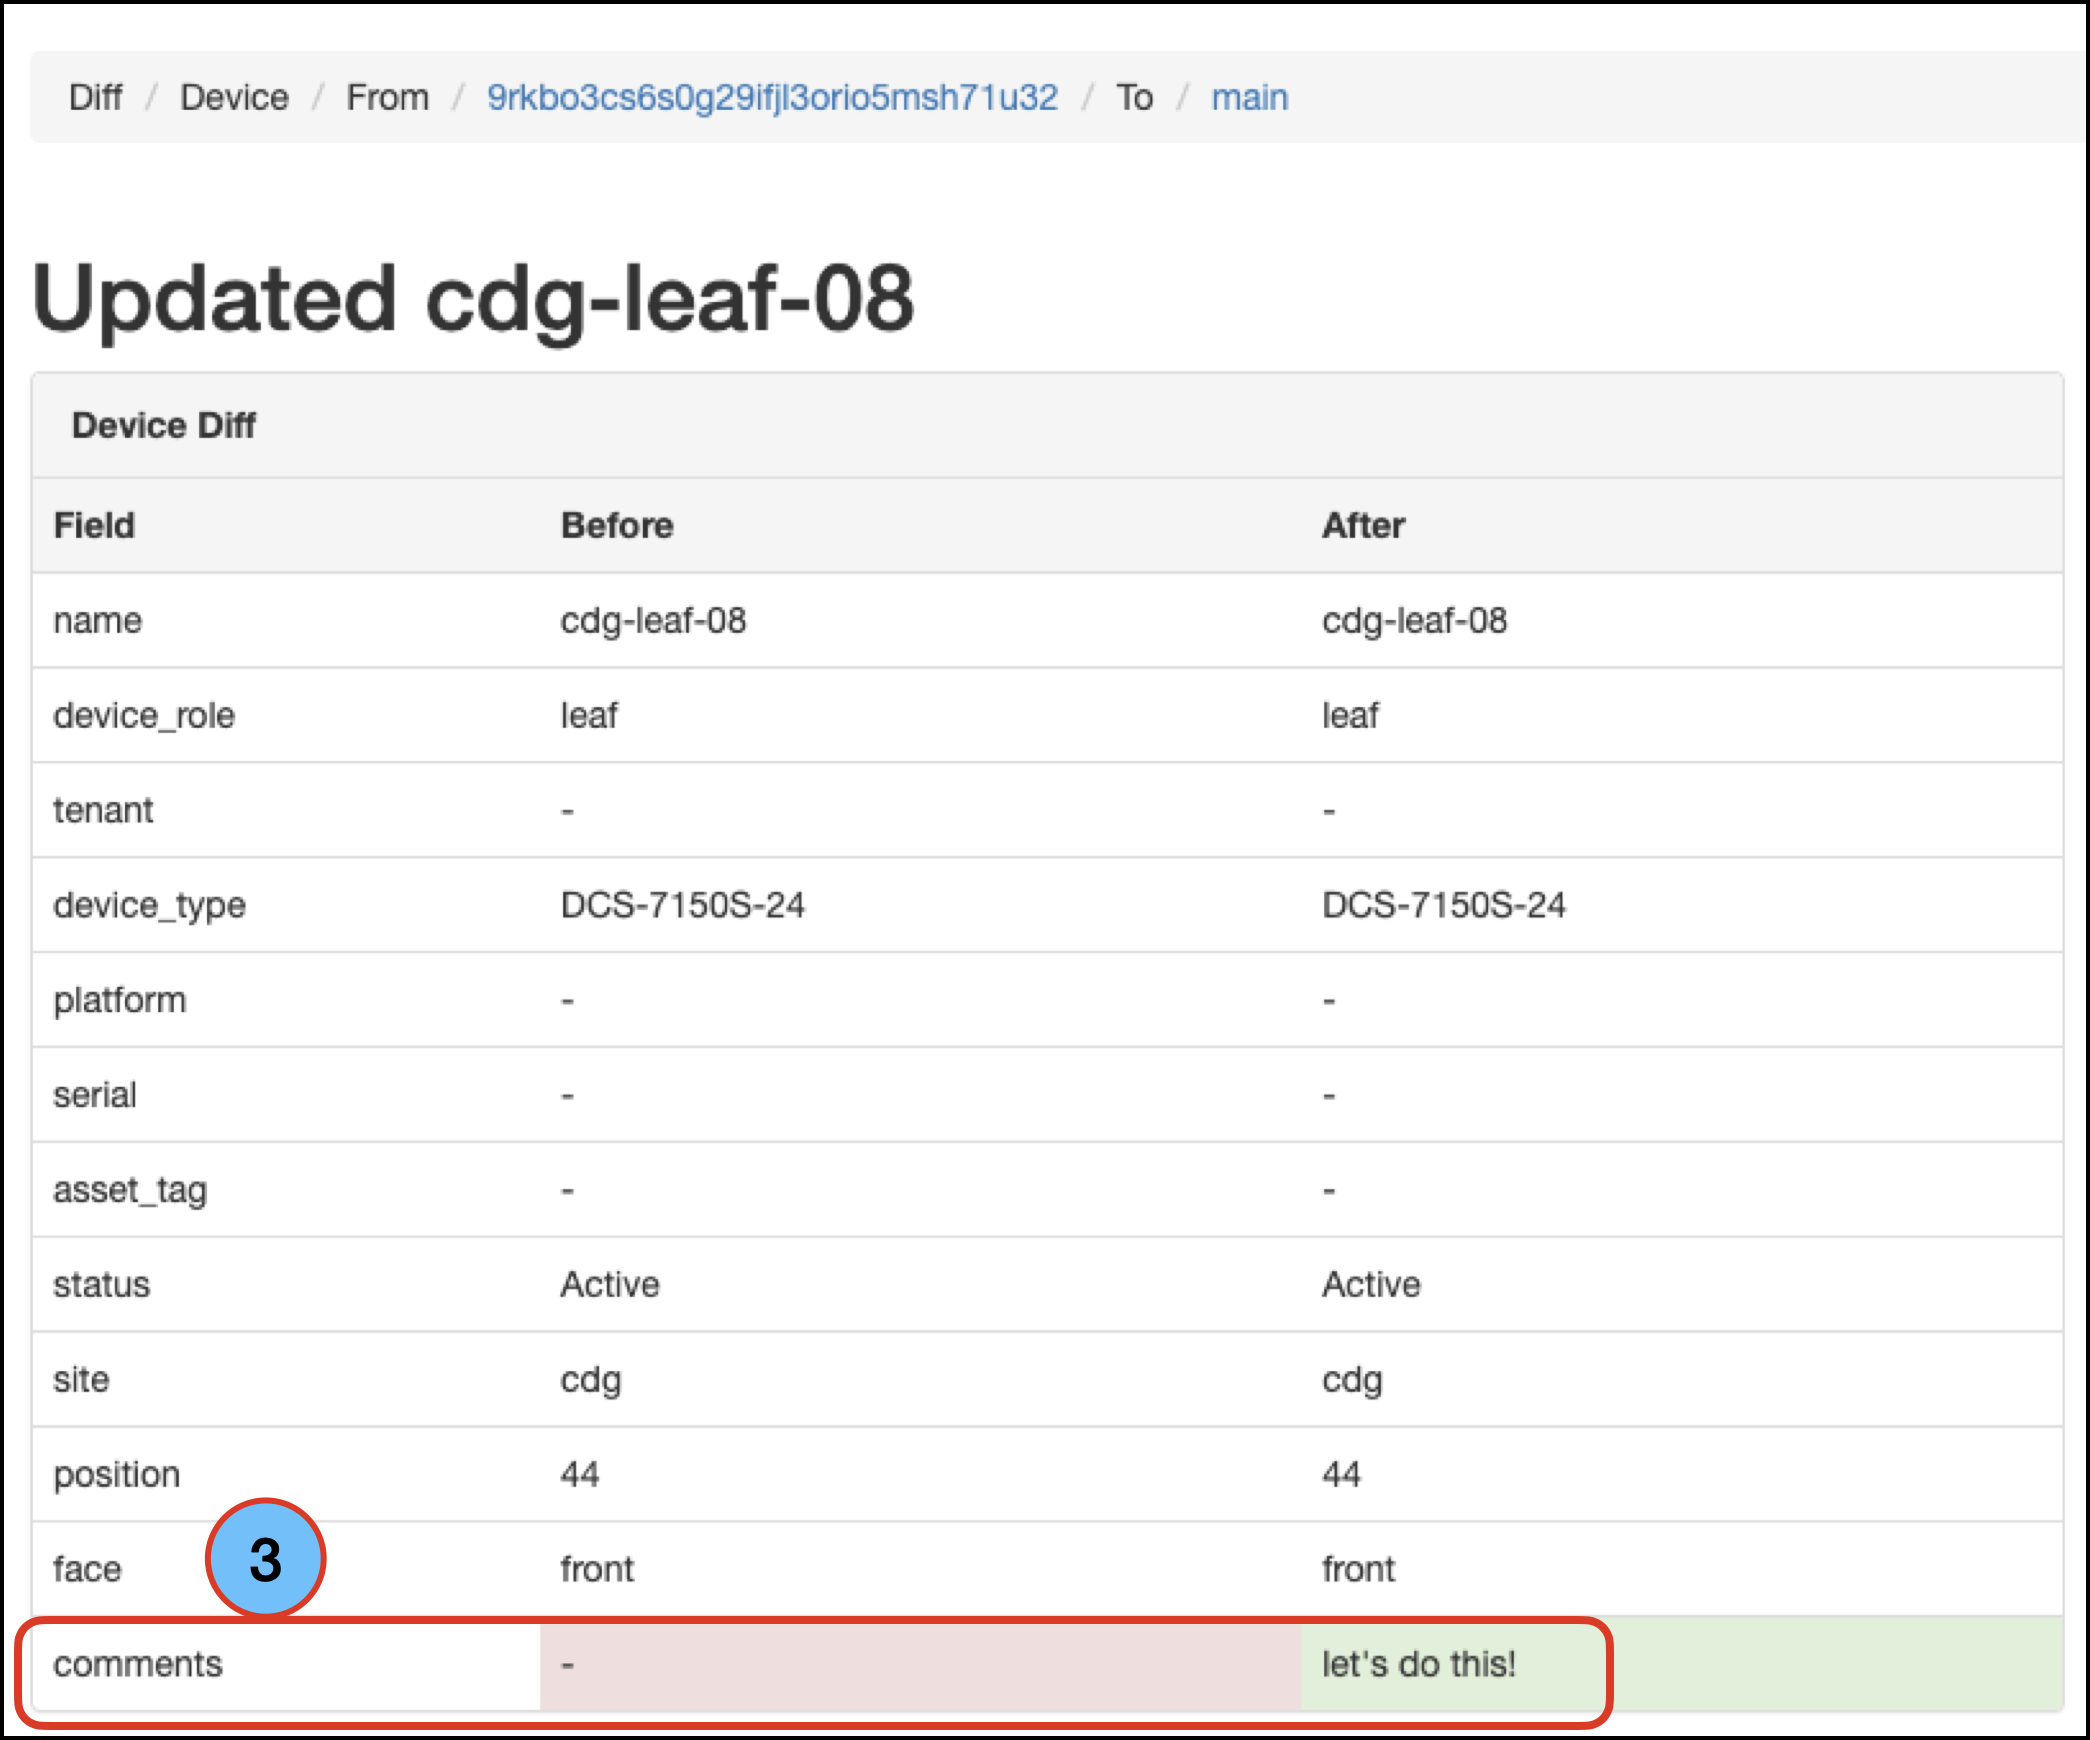
At this point you can either revert the specific commit in your PR or modify the other branch with the conflict (the main branch in this example).
Reverting Commits
At any point during the process of making changes in a branch, reviewing a PR for the changes in a branch, or trying to revert changes already in the main (production) branch, you may want to revert specific commits or revert commits en masse. View how to revert commits here.